Showing posts with label 1st Quilt Ever. Show all posts

Friday, June 10, 2011

Speaking of Ugly.... and advice, please!

A few years back I found this beautiful hideosity...
I could hardly believe my eyes. I mean, the combination of flowers and ferns and swirls and curls -- not to mention COLORS -- It's just fabulous!


-- and large scale!!!


I put together this quilt top to go with it, figuring the crazy fabric would go on the back. It has very subtle curves and is just as crazy as the backing. Problem is, I got this far and couldn't decide what to do next! I was thinking I should do a skinny white border and a wider blue border, but I think the borders need to have subtle curves as well. And I just can't find a blue that I like with it!

What do you think?
And, who on earth is going to end up with this thing? It's not exactly pretty... but it is baby-sized.
I can't really give it as a baby gift, can I?

Here! Have a super ugly quilt that will likely keep your daughter up all night with its freakishness!

???? :o) ????

Monday, May 16, 2011

Bloggers Quilt Festival

I'm joining in the fun over at Amy's Creative Side with the Spring Bloggers Quilt Festival!


Today I am sharing a recent favorite quilt -- my all black-background I-Spy quilt! I just love the look of this quilt, with it's all black-background spies (in pairs! It's a matching game!) and the bright pop of turquoise in the border, binding, and backing.


I started this quilt last December when I really needed to procrastinate getting some Christmas gifts done. Turns out, though, that it made the perfect Christmas gift for my nephew -- and it also renewed and rejuvenated my soul to create something so fun! Timing is everything, even when you may not think you have the time! I had so much fun going through my ridiculous stash of I-Spy squares and sorting out all the black ones. In fact, my stash is SO ridiculously big that I was even able to pick and choose things especially special to my nephew -- even with the color limitation I gave myself.


I backed the quilt with a super soft fuzzy backing, which gave it that extra snuggliness I was craving.
This quilt is definitely in my top ten favorite I-Spy quilts!

Thanks for stopping by!

Monday, June 14, 2010

Quilt Show WINNER

As promised, I have picked a random quilt show winner via random.org!

The winner is receiving this:

Fabric for another "1st Quilt Ever" quilt!
Eight 1/4 yard cuts, two 1/3 yard cuts, and one 3/8 yard cut -- enough to make the entire quilt top!

Let's hope your first "1st Quilt Ever" quilt gave you a little taste of the quilting obsession -- and that you want to do some more!


All right, random.org! Who's it gonna be??

Lucky #2, who is.....

CHRISTINE!!

Congratulations, Christine!
I'll be emailing you for your mailing address!!!

1st Quilt Ever -- THE SHOW!!

It's here!
The long-awaited SHOW of quilts made from the
1st Quilt Ever Tutorial Series!

There are a whopping 23 entries -- and each one is just amazing! It has been SO much fun for me to see everyone's quilts and read about each person's experiences with the process.

Below each picture is the name of the maker, along with her own description of the quilt.

Sit back, relax, and enjoy!


by Garilyn
This quilt is for my sister, Alyssa, in celebration of her graduation from UNC-G with an Environmental Biology degree. I chose "earthy" colors as requested (although she didn't know what I was making). I liked how easy it was to let my kids help me and make the choice of which squares to put by which square...even my 3 yr old could help and they weren't going to mess it up! This was my 4th fully finished quilt.


by Christine
This IS my first quilt ever. The fabric is Animal Alphabet by Moda. I have wanted to learn to quilt for a long time. When you announced the quilt-along, I had already chosen the green fabric for some curtains. I really wanted to make a quilt but I didn't know how, so I was SO excited!


by Shilo
This quilt is for my 4 year old nephew, always happy and full of energy I picked fabrics that reflected him. I loved following along with the quilt along. I really hope Care does another! lol! I will totally be using the directions to make many more quilts and now I won't have to wait...or catch up lol!


by Melanie
I made this quilt for my daughter's toddler bed. Her favorite color is yellow, but she loved the other colors we added too. My favorite part of the process was quilting it on my machine. This quilt was my first time I had done that, but it won't be my last!


by Susan
I can't say I enjoyed every minute of making this quilt, but now that it's done, I want more! Kind of like childbirth that way, isn't it? Thanks again, Care, for demystifying the process! And thanks for all the exclamation points!!!!!!!!!!!


by Rebecca
I loved the process of making my very first quilt! I chose the colors to be a bright and cheerful wildflower theme. This one was for me to keep and I love it!!! ;)


by Rebecca
After making my first quilt, I was instantly addicted and started right away on my second. This quilt is for my grandmother who loves the color blue. When I gave it to her she was so impressed and touched. She said, "No one has ever made a quilt for me before."


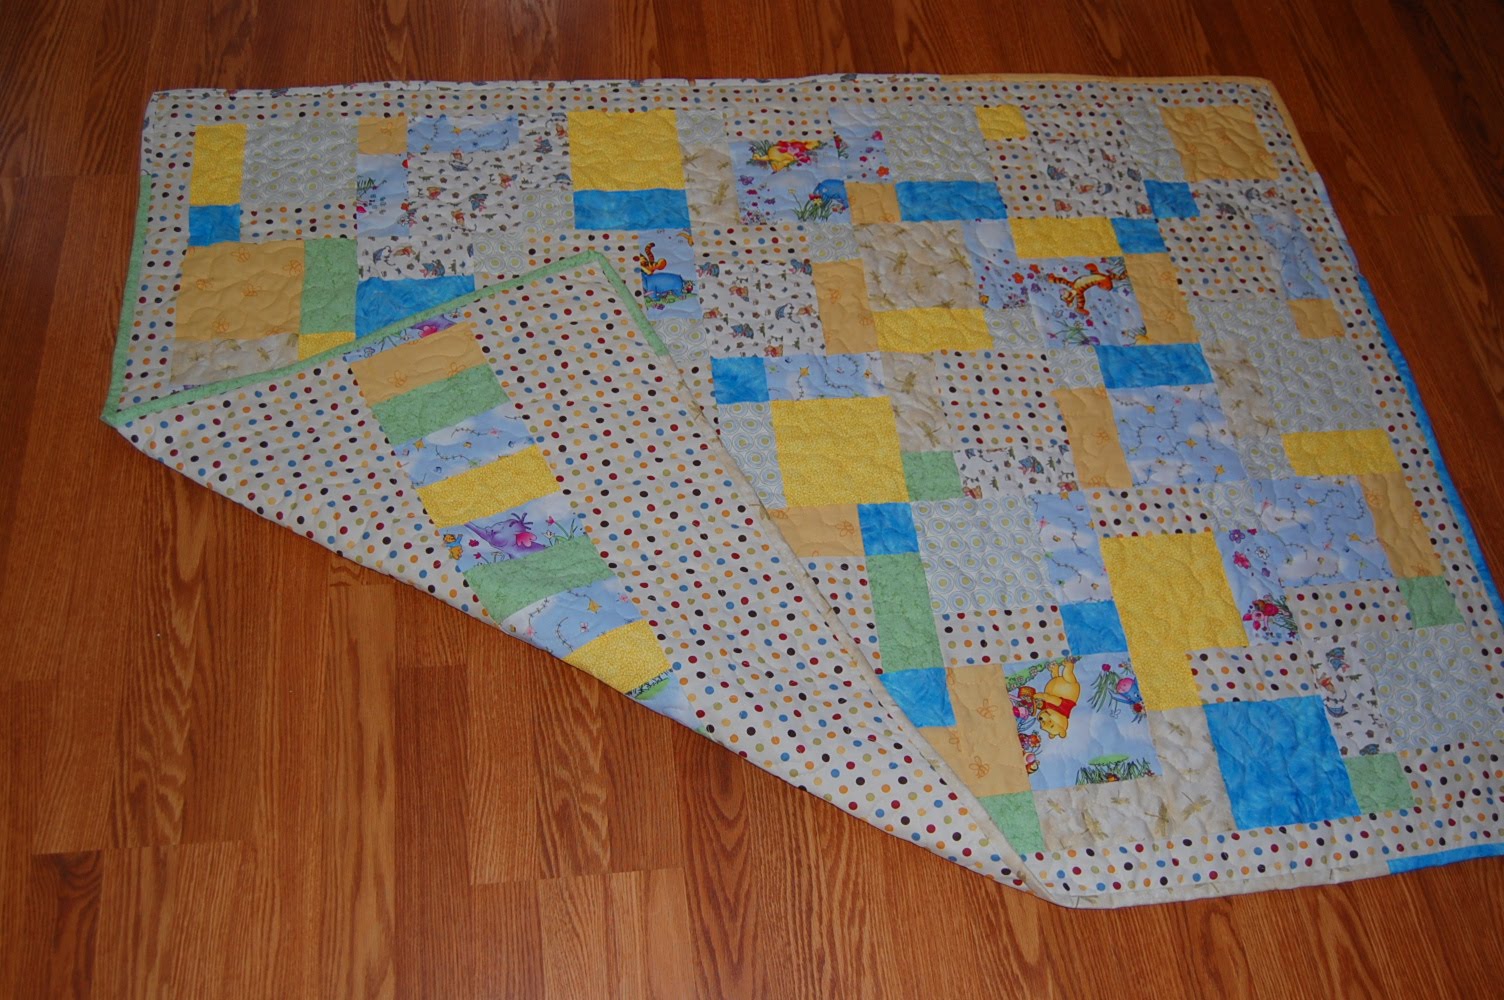
I made this quilt for a raffle at the crisis pregnancy center where I volunteer. Each time I made a quilt the process became easier and faster, I completed this Winnie the Pooh themed quilt in only 2 days.


by Megan
I really love the way my quilt turned out. Although it is not perfect, the colors make me happy every time I look at it. I was worried about the sandwiching and machine quilting part, but once I started them I found it really wasn't that hard.
I had a wonderful time participating in this quilt along series. I learned so much. In fact--I have already started working on another quilt.


By Kris
This is the first quilt I have ever made!! I picked out the orange fabrics first and then found the backing fabric and moved over to find some complimentary blues to add in and filled out the rest with some simple patterns. My favorite part of the quilt is my fabrics and the pieced binding. Every step of making this quilt was so much fun, I can't wait to make the next one!!


by Catherine
I have wanted to make a quilt for a few years but didn't really know where to start. This was perfect for me and I had so much fun making myself a girly quilt in my house full of boys. I loved learning how to free motion quilt and the hand finished biniding is one of my favorite parts of the quilt. This is my first quilt but it definitely won't be my last. ;)


by Becky
This quilt is for my niece, who was born just over a month ago. The fabric is "Love U" by Deb Strain for Moda; the nursery is dark blue and pink. I appliqued her name on the back, too. I really like the design aspect and seeing the pattern come together. I think my least favorite part is hand sewing the binding (but that could be that I completed 2 quilts in one week!) but overall I enjoyed the whole process. This is my third quilt, the second that I machine quilted. I have completed two (larger) quilt tops since this one, and am in another quilt-along currently, so you can say that I am very quickly getting addicted!


by Emily
For my quilt, I used the fabric left over from making my baby's jungle-themed nursery linens and gear. The quilt works great for snuggling now and will also be a cute bedspread once my little one moves to a toddler bed. It was great to finally solve the mystery of free-motion quilting and I gained confidence (and alot of curiosity!) to try other quilting patterns as well.


by Heather
I wanted this quilt to be an accent in my guest bedroom, which was quite lacking color, but this quilt certainly helps! I ended up machine finishing my binding, and I'm not displeased with the effect. It could be better, but I am in the midst of another hand-finishing project and one is enough! I think with practice I could perfect my technique though.


by Denise
I chose these fabrics because I wanted my first finished quilt to be something I would love and these prints remind me of my childhood. I was really surprised that I used so much orange (the backing is orange with the strips of front fabrics) cause I'm not really crazy about orange. I really loved chosing the fabrics and cutting the blocks to make the quilt top and seeing the pattern emerge. I didnt like the quilting part probably because I was getting the quilting squiggles too close but other than that I really liked making this quilt and am going to be cutting out another one using oriental fabrics.


by Holly
Described by her daughter-in-law Catherine: This is my mother-in-law's quilt. I got her to do First Quilt Ever with me. It's her first. She's big into patriotic and my brother-in-law is in the Air Force so she got most of the patches print to read or show Air Force on them.


For my oldest daughter. She came with me to pick out the fabrics, and we had a great time together. At 3 years old, she got a great lesson about matching colors. I even quilted her name and some shapes in the quilt for her.


by Amanda
For my 2 year old daughter. After starting the first blanket for daughter #1, I decided I better make them both one at the same time. So I did, this is actually the first one that I finished. It has her name quilted in it also, and she wants to play with it all the time now since it has her favorite color in it. PINK!


I was asked by my mom, to make a quilt for our dance teacher. She teaches my mom, me, 3 sisters, and my 3 year old. My mom is in charge of a end of the year gift for the teacher from all of the students, and this was my idea. It was a great idea at the time, but since we started it on Monday and had to have it finished by Saturday for the dance recital it was a big project. I did get the entire quilt top cut and pieced in one day though (I made it bigger a 60 by 75). Quilting and finishing the binding took the rest of the week.


by Shannon and Lindsay
This is my daughter's first quilt and my second! She sewed the entire top and I quilted it for her. She chose all the pretty fabrics. I love this pattern because it was so simple to sew and cut! Thanks for teaching us the process!!


by Ruth
I took a quilting class in February and decided I didn't want to do another traditional quilt so when I ran across the 1st Quilt Ever site I felt like it was meant to be. 20+ years ago I completed one quilt that I hand tied and one quilt top (that I gave away). I've made several blankets for the grandkids but this is truly my 1st real quilt. I fell in love with the owl material and coordinated around that. I enjoyed the entire process of making this quit - even the washing, ironing and starching. The best part was quilting. It was also the part I was most intimated by. I pushed myself through each step and discovered that none of it was as bad as I feared! Care's instructions and tutorial were better than the class I just completed. I already have another quilt started and am planning to make 2 more with this pattern. My finished quilt is 73x59 and I'm keeping it all for me!!!


I'm not a big sewer, and this is my first quilt ever! Fabric selection was a bit random, but I had a colour scheme in mind and was keen to keep the patterns as whole squares and use the plains to make a pattern within the quilt. It was a present for my mum so I think I got away with it being far from perfect! I was surprised how quickly I got it done and enjoyed most of it, but the quilting was harder than I expected. I'm now keen to do a (neater!) larger quilt for my bed, but that's a bigger challenge...


by Melissa
I made this quilt for my daughter's toddler bed. I'd made a quilt before, but this was my "1st Quilt Ever" incorporating free-motion quilting, borders, and binding. I learned a lot, was generally pleased with this project, but have already made another quilt applying the skills I've learned that I'm even more proud of. Thanks Care for doing the series!!!!!


THANK YOU, everyone, for joining the quilt show!
It's been so much fun, and so rewarding, for me to see all the quilts you've made from my tutorial series. And I am THRILLED to read that many of the new quilters are already making plans for more quilts!
HOORAY for spreading the obsession!!

Thursday, June 10, 2010

1st Quilt Ever -- Show Information

FINAL CALL FOR ENTRIES!!

Here are the details about entering your quilt in the show:

Your quilt
DOES NOT have to be the first quilt you ever made, but it MUST be a completed disappearing nine-patch quilt made using my quilt-along series called 1st Quilt Ever.


What I need from you:

1. ONE PHOTO of your quilt. Make it a good one!!

2. Three or four sentences about your quilt. (Ideas: Why/how you chose the fabrics, what you liked about the process, what you hated about the process, who it's for, what number quilt this is for you, whether you think you'll ever make another quilt -- etc, etc, etc!)

3. If you'd like, send me your blog url or flickr name to link your quilt to.

Please send your photo and info to
stitchwhipped {at} gmail {dot} com

The show is scheduled for June 14th. I must receive your entry by Friday, June 11th at 10PM Eastern.

Entries will appear in random order in my quilt show post.
You may enter more than one quilt -- as long as each quilt is made from the quilt-along series.

PRIZES? YES!! Well, one, anyway! This is a no-pressure quilt show, so there will be no judging, voting, or scrutinizing! On Tuesday the 15th I will simply pick one lucky entrant via random.org to win a top secret prize!


I look forward to receiving all the entries!

Wednesday, May 26, 2010

1st Quilt Ever Show Details(ish)

Okay, I have taken the plunge and set a date for the 1QE Quilt Show.

Monday, June 14th!

That gives everyone about 2 1/2 weeks to finish up their quilts (or make another one... hee hee!) and it gives ME a little time to finish up some of my other obligations! Win-win, right? I hope so!

For everyone who has already emailed me to say you're either done or very close, I will send out an email with the information I'd like in the next day or two. If you haven't emailed me yet, my email address is:

stitchwhipped{at}gmail{dot}com

Send me an email so I know you're interested in participating!

1st Quilt Ever Quilt Show... Call for Submissions!

Tiny little reminder!

THE SHOW CANNOT GO ON WITHOUT YOU!

If you participated in 1st Quilt Ever, and have completed (or are soon to complete!) a quilt you'd like to enter in my little blogland quilt show...

Please send me an email at

stitchwhipped {at} gmail {dottydot} com!!

I'd like to get some quick numbers of how many participants there are, as well as a little bit of information about your quilt.


Can't wait to hear from you!

Wednesday, May 12, 2010

Completed Quilt -- and a GIVEAWAY! (CLOSED)

The quilt I created during the "1st Quilt Ever" quilt-along is complete!

(GIVEAWAY IS NOW CLOSED)

As part of my celebration for reaching 1,000 followers a couple weeks ago,
I AM GIVING THIS QUILT AWAY!

The finished quilt is approximately 45"x60", made with 100% cotton fabrics, machine quilted, with a hand-finished binding, and it is ready to be mailed!

Here's how to enter:

~ Leave a comment. (Make sure your email address is available!)

~ If you are a trusty-dusty follower, leave another comment saying so for an extra entry.


I will choose a winner via random.org at 8AM Thursday May 13th!

Good luck, everyone!

Tuesday, May 11, 2010

Disappearing Nine-Patch: I-Spy Version


Here's how to make an I-Spy version of the Disappearing Nine-Patch. It's SO EASY, but it looks like you spent FOREVER on it! I am assuming throughout this tutorial that you are familiar with the Disappearing Nine-Patch pattern -- I have previously posted specific step-by-step instructions on that quilt pattern, which you can find here.


What you need:

~ 88 - 4" I-Spy squares (From time to time I host swaps where you can join in and trade with others to collect these!)
~ 1 1/8 yd fabric for sashing (mine is white)
~ 1/3 yd fabric for setting squares (mine is blue)
~ 1 7/8 yd fabric for backing
~ 3/8 yd fabric for binding
~ crib size (45"x60") batting


What to cut:

From sashing fabric:
~ 88 - 4" white squares
~ 17 - 2"x4" white rectangles

From setting square fabric:
~ 22 - 4" squares
~ 20 - 2" squares

From binding fabric:
~ 5 - 2 1/2" strips -- sew end-to-end to create one long strip

Finished Quilt Size:
41 1/2" x 56 1/2" (nearly crib size)


Here is the KEY to setting up your blocks -- the lower right corner's I-Spy always needs to face the same direction no matter which way you turn the block. I made my lower right corner's I-Spy always right side up.


STEP ONE: Sew together the center rows on all your blocks. Start by sewing a white square to every blue square. Then sew another white square to the opposite side of every blue square -- creating 22 rows of white-blue-white.


STEP TWO: Place your stack of I-Spy squares right side up (with the bottom edge of the I-Spies closest to you) to the right of your stack of white squares. Fold one I-Spy over one white square like shutting a book, and sew the right side seam with a 1/4" seam allowance. Repeat until you run out of white squares.


STEP THREE: Open all your sewn squares and stack them with the I-Spy square on the left. Place your I-Spy squares to the right, with the top edge of the I-Spies lined up to the edge of the white square, as shown in the photo.


STEP FOUR: Take the top I-Spy square from the right hand pile and fold it like closing a book over the left hand pile. Sew the right side seam with a 1/4" seam allowance.


STEP FIVE: Press your rows! Press the seam allowances toward the darker fabrics (toward your setting square fabrics and toward your I-Spies).


STEP SIX: Set up your rows as shown. CAREFUL -- It DOES matter which way those rows are set up! Close one I-Spy row over one setting square row like shutting a book. Sew right seam with 1/4" seam allowance, matching seams on the rows.


STEP SEVEN: Set up your rows as shown -- again, be CAREFUL! It matters which way those rows face! Close right side I-Spy row over the left side like shutting a book. Sew right seam with 1/4" seam allowance, matching seams on the rows.


STEP EIGHT: Press seam allowances to one side. (I pressed mine towards the I-Spies.)


STEP NINE: Cut your nine-patches into quarters as shown, measuring and cutting carefully. Your sashing and setting squares are DONE -- with the exception of the bottom row of your quilt and the right side vertical row of your quilt -- which you will piece together using your white rectangles and 2" squares.


You're ready to lay out your squares and sew them together!!


Wasn't that EASY??

(I never could decide whether I would have preferred an additional border on this quilt -- but it would be simple to adapt the pattern to allow for it!)