Showing posts with label quick stuff. Show all posts

Friday, July 8, 2011

Silver Shoes in 20 Minutes!

I have an INSANE weekend!
Two family reunions AND a wedding!
All at the same time!

I needed to have silver shoes for the wedding (Bride's request -- I am an attendant), and couldn't find any cute ones ANYWHERE. What to do?


Heh heh heh....


I found some cute shoes on clearance for $10...
filled them with crumpled newspaper...


taped up the soles where I didn't want them to be silver...


and busted out a can of silver spray paint I already had on hand.
A total of 20 minutes later (the taping took the longest of everything)...
TA DA! Silver shoes!

On to the next Big Weekend preparations........

Thursday, June 2, 2011

The no.2 Pencil Softie -- TUTORIAL!

There's something about oversized or undersized objects that just tickles me... and today's project is certainly no exception!


So... just how oversized IS the pencil softie?
......


Here it is with its regular-sized counterpart!
Hee hee!

Want to make one?
C'mon, you know you want to!


What You Need:
Fleece
(scraps will do! I chose classic pencil yellow, grey, black, tan, and pink)
Sewing Machine
Polyester Stuffing
Needle and Thread

STEP ONE:
Cut your fleece as follows:
yellow: 9"x5"
grey: 2"x5"
pink: 1.5"x5" + a 2" circle
black: small scraps
tan: (see step two!)


STEP TWO: Cut your tan piece. Begin by folding your yellow piece in half, long sides together. You will fold your tan fleece and place it next to the folded yellow piece, with the fold at an angle and cutting at an angle. This does not make sense, I know, until you look at the next photo!


Basically, it is a diamond with its angled sides the same length as your folded yellow piece -- 2 1/2"!


STEP THREE: Topstitch a black scrap to the end of your tan piece to create the lead tip. I cut a curve on one end and sewed along the edge of the curve a scant 1/4" from the edge, then trimmed the angled edges to size. Do not cut away the tan fabric from the back side of your lead tip.


STEP FOUR: If desired, stitch a "no.2" on your yellow rectangle. I used my free-motion foot to "write" it, then cut away the excess with finely pointed scissors. You could also choose to embroider it on once your pencil is completed, using black yarn.

Also attach your grey rectangle, right sides together, using a 1/4" seam allowance.


STEP FIVE: Sew one long side of your pink rectangle to your pink circle, gently matching the curve of the circle as you go and using a scant 1/4" seam allowance. Remember to start and stop 1/4" from the edge of your rectangle.


This is what it should look like when you turn it right side out.


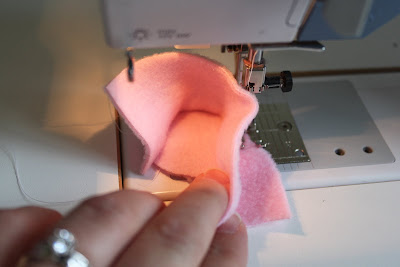
STEP SIX: Sew the other long edge of your eraser's rectangle right sides together to your grey piece, gently pulling the eraser piece around in front of your sewing machine foot as you go -- as shown.


STEP SIX: Attach the tip of your pencil. Line up the edges together for the first half of the tan piece, then stop at the midpoint (with your needle down), lift your presser foot, and turn the tan piece to match the edges of the second half. Put your presser foot back down and sew to the edge.


STEP SEVEN: Finish sewing the pencil together! Line up the straight edges of your eraser and start sewing, matching up the seams as you go. Leave a space about the width between my fingers, as shown in the photo. Then start sewing again, all the way to the point.


STEP EIGHT: Turn your pencil right side out and stuff it firmly with polyester stuffing. Sew together the opening using a whipstitch.


You're done!!

Saturday, May 14, 2011

Itty-Bitty Photo Frames

Today I'm over at Dollar Store Crafts sharing these itty-bitty photo frames. Wouldn't they be SO CUTE on a scrapbook page, or in a dollhouse?

Come check it out!!

Friday, April 22, 2011

QUICK Easter Chicks

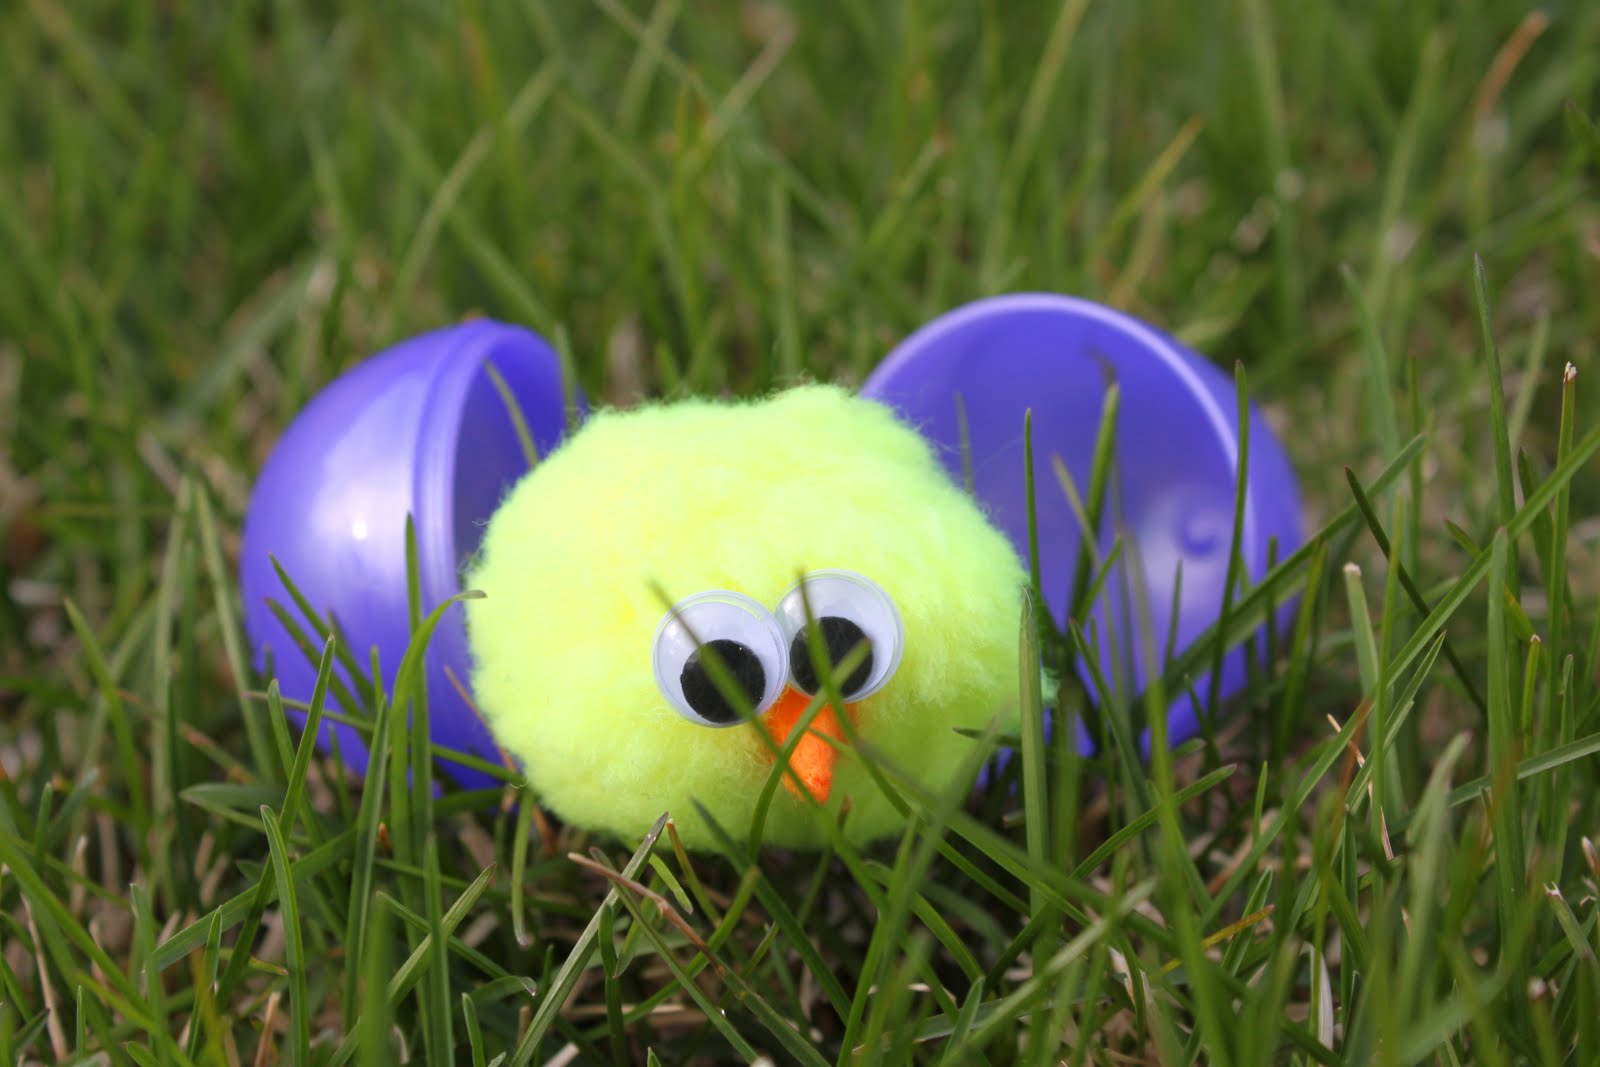
I whipped up a handful of these cute little chickies in just a few minutes. I simply sewed a tiny cone of orange fleece to a bright yellow pompom, then added some googly eyes. Easy! They are so cute hatching out of Easter eggs!


It all started with these little guys....
My kids ADORE the little television series called "Shaun the Sheep." There is one episode where Shaun encounters some little chicks. It is their favorite episode! I already had a stuffed Shaun the Sheep from years and years ago (from the original Wallace & Gromit short called A Close Shave). With the addition of the little chickies, the kids are in heaven!


Shaun's chickie friends have no eyes -- just little beaks. My kids prefer them this way -- true to the show. I admit, though -- I like the googly eyes!

Friday, March 25, 2011

Fleece Bomb

Over the weekend I got an email from Adeela of Sew Kool, sharing a link to the Angry Birds she had created. In one of her photos I saw one of the coolest things I've seen in blogland in quite some time -- a fleece bomb!! I knew instantly my boys would absolutely LOVE to have some -- so I asked her for the details. She put together a tutorial for them. (Click here to pop over -- and be sure to tell her hello!) I finally had a little time this afternoon to put a few together. It took me less than an hour to put together three of them. I opted not to do the flame on the end, although my boys have said they would prefer it. Guess I'll be adding that! Since I was making them with materials I had on hand, I ended up using cotton cording (normally used for piping) for the fuse, rather than yarn. I'm happy with how they turned out -- and the boys are ecstatic!

Wednesday, February 16, 2011

Tiny Kitten in a Box


What you need:
~ fleece scraps -- black, white, and light and dark of a color of your choosing -- I will call it blue throughout the tutorial
~ thread (I used white for everything!)
~ tissue paper
~ pencil
~ finely pointed scissors
~ free-motion presser foot (optional but highly recommended!)
~ small amount of fiberfill stuffing
~ pattern -- click HERE! (pg 1 = cat, pg 2 = box)

Please read through the entire tutorial before starting -- the cutting directions will make SO much more sense that way!


STEP ONE: Using a pencil, trace the pattern onto your tissue paper. Cut it out, leaving about an inch around the perimeter.


STEP TWO: Cut your fleece.
Important: Be sure the stretch of your fleece runs left to right!
You will need:
2 light blue rectangles the same size as your tissue paper pattern
1 white rectangle large enough to cover the eyes and nose of your pattern1 black rectangle large enough to cover the pupils and nose of your pattern
1 dark blue rectangle large enough to cover the width of your pattern plus the height of the stripes
(You don't need to measure -- eyeball and chop. If all else fails, cut all your pieces the same size as your pattern!)


STEP THREE: Layer as follows:
Place one light blue rectangle right side DOWN. Place your tissue paper on top. Lift it up and place your white rectangle over the area where the eyes and nose will be, then place it back down so the white is on the bottom and the tissue paper is on top.


Like this!


STEP FOUR: Sew around the eyes and the cheeks/chin. I use my free-motion foot for this, but if you don't have one you can do the needle-down-lift-the-foot-and-turn maneuver.


Here's what it will look like on the other side.


STEP FIVE: Using your scissors, carefully trim the excess fleece away from around your stitching lines.


STEP SIX: Layer your black rectangle over the eyes and nose.


Flip everything over to the pattern side and sew around the pupils and nose.


Trim away excess.


STEP SEVEN: Layer your dark blue rectangle over the stripe area of the light blue rectangle. Again, be sure the stretch of your fleece runs left to right.


STEP EIGHT: Flip over and sew the stripe lines. Trim away excess fleece.


STEP NINE: Layer your second light blue rectangle on top of your kitten's face, right sides together.


Flip over and sew on the line, leaving about two inches at the bottom open for turning and stuffing.


STEP TEN: Tear away as much of the tissue paper as you care to -- it doesn't matter if it's perfect because it will all hide inside!


STEP ELEVEN: Trim near your stitching line all the way around except at the bottom opening, as shown.


STEP TWELVE: Turn your kitten right side out, carefully poking the ears out with a blunt object. Stuff her!


STEP THIRTEEN: Carefully poke the seam allowances of the opening inside and hand sew the hole closed. (Look what happened to my apparently very weak needle! I was pulling it straight, and -- pow!)


Voila! A cute little kitten!


You can definitely get creative with colors. Look at these little special-request kittens I made for my nieces and nephew:
It's definitely extra work to give them colored eyes and pink noses, but they just turn out so cute that way!


The box pattern is on page 2 of the pattern file. I tried a few kinds of cardboard, but the cardboard from a pizza box was definitely the best scale.

Best of luck with your kittens!
Please pretty please post photos to my flickr group if you make one! :o)

Friday, February 11, 2011

Tiny Cat in a Box!

After making a little Sleepy Kitten for each of my kids this past weekend, I had to make one for myself --and of course I had to make her look like my own kitty, Smeagol!
(Update: Pattern and instructions can be found HERE.)

And what kitty doesn't love a BOX?? I had so much fun making my mini Smeagol a little mini cardboard box!


Here is big Smeagol in one of her favorite boxes (yes, she is a girl!)


Then I had to take it even further and give her a tail. Love!


She's so little!

I got to enjoy her for a few minutes -- until JellyBean woke up from her nap. It took all of six seconds for her to claim tiny Smeagol as her own! Oh well! I don't mind! :o)

Monday, February 7, 2011

Sleepy Kittens

My oldest son is convinced that I can sew ANYTHING. This is a great compliment, however sometimes it gets me into trouble. From time to time I get very odd and/or impossible requests! Other times there is something he desperately NEEDS me to make. Yesterday morning was one of those times!

We love the movie Despicable Me. There is all kinds of fun weaponry for Buzz to think about and to make -- from freeze guns to shrink rays to piranha guns. He's got those ones covered -- he is a Scotch Tape Master! He can make any kind of weapon using his ultra deluxe scotch tape dispenser and various cardboard tubes, balls, pipes, etc. He is very creative, and I encourage him to keep doing it! Sure, we go through a lot of tape, but hey -- if you ask me, creativity is KEY!

Anyway, I digress. There was something ELSE he wanted from the movie -- something he couldn't carry out with his media of choice. Something that was not a weapon. So he carefully drew up a plan and asked me for some help. What did he need so desperately?

A little green Sleepy Kitten from the book in the movie!


It didn't take long to draw up a quick pattern and make him his Sleepy Kitten -- and I got it done just before the mad rush to get ready for church. Of course I couldn't get away with making just one -- so two more followed yesterday evening. They were quick (and fun!) to make -- and they have been having all kinds of adventures all throughout the house this morning!

So little!
Now, if it had been up to me, I certainly would have added tails -- and feet -- but Buzz was adamant that they were not a part of his design! Oh well... They are cute even without tails!

(By the way, from what I can tell they created the book AFTER the movie. It looks adorable!)

(Update: Pattern and instructions can be found HERE.)