
Hee hee! I am tickled by today's project for
Dollar Store Crafts. But, then again, you know me and tiny things -- I just love them! Can you guess the source of my doll bed frame and comforter?

The comforter and pillow were made from a dollar store pillow cover -- with fabric to spare -- and the bed frame was made from two wooden "Zen Garden" trays, also from the dollar store. I have had my eye on those for over a year, knowing they had great potential. Finally the perfect project to use them for!
Here's what I used:
~ One pillow cover (lots of prints and fabrics to choose from!)
~ Two Zen Garden trays
~ Scrap of eyelet trim (for the bed skirt)
~ Scraps of white fabric (for the mattress and bed skirt)
~ Scraps of polyester batting
~ Also need: sand paper or utility knife, wood glue, finish nails, saw

(pardon the lighting on this photo and the next one, taken down within the depths of the basement!)
First we will need to construct the bed frame. My husband was kind enough to tackle this part of the project for me!
STEP ONE: Measure and mark ONE of your Zen Garden trays 3 5/8" from one end and carefully saw. The longer piece will be the headboard, and the shorter piece will be the foot of the bed.
 STEP TWO:
 With both cut ends together and the two tray pieces back to back, use a sharp pencil to draw a line on the headboard piece, marking the height of the foot of the bed, as shown.
 STEP THREE:
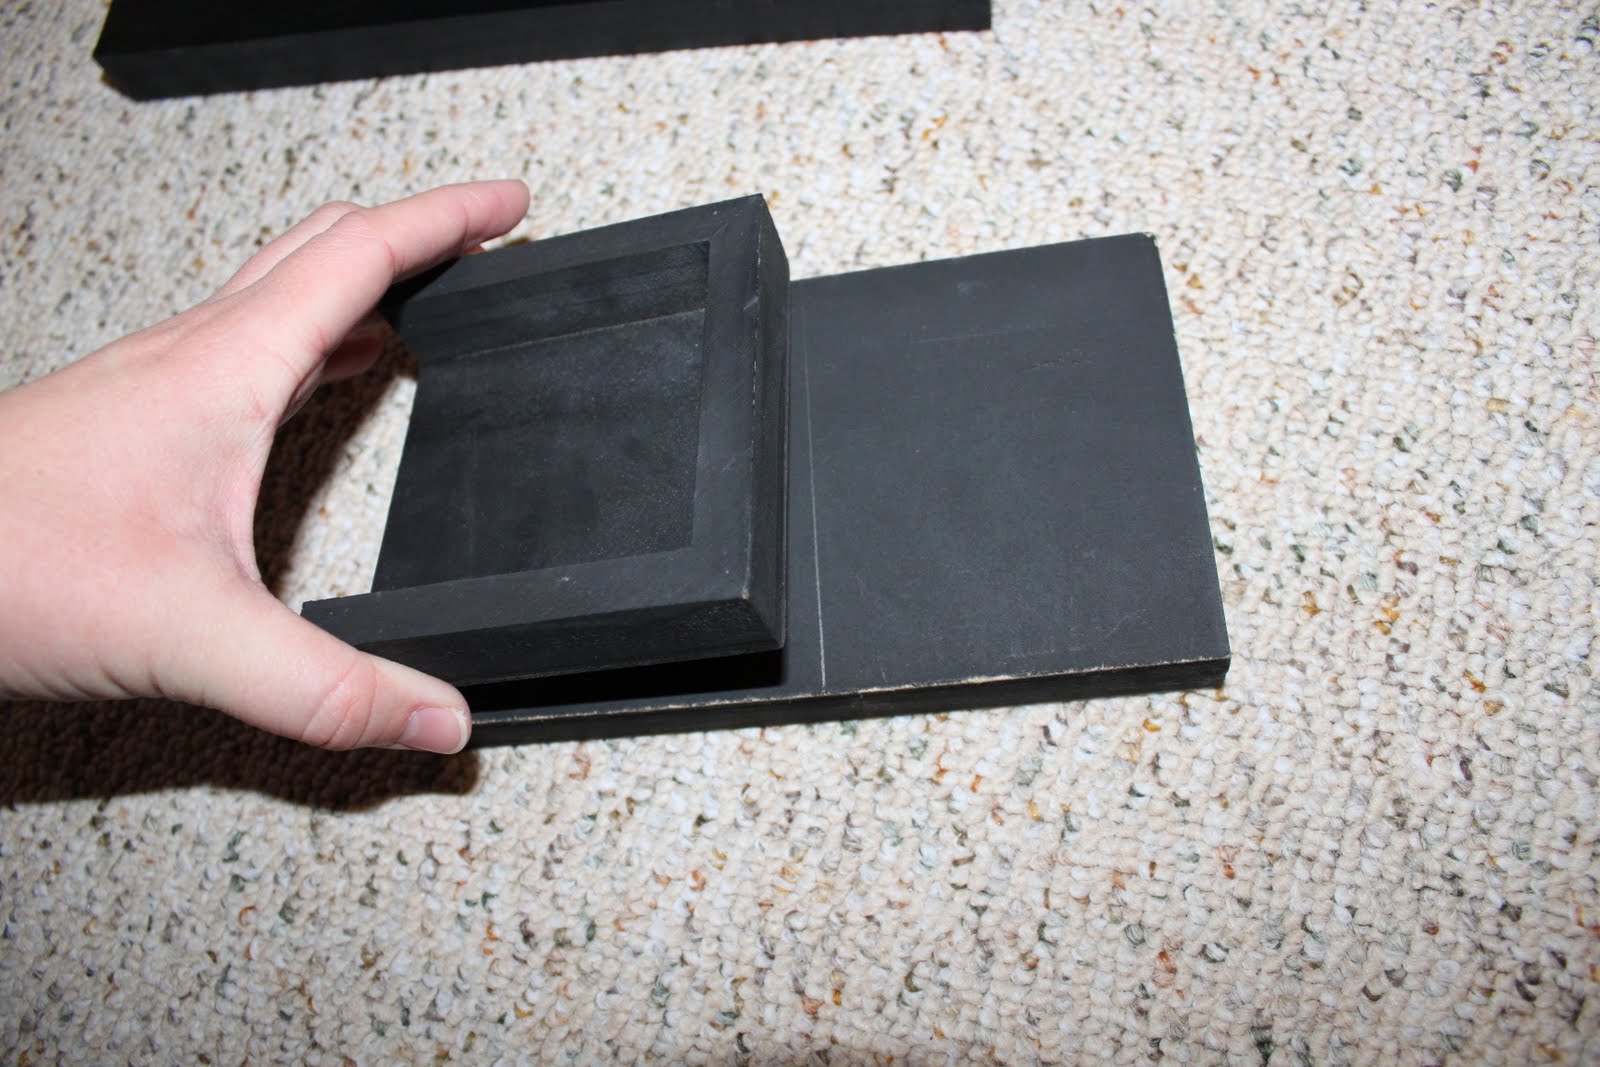
 You will be butting the shorter end of the first tray (the foot of the bed) against the short end of the second (uncut) tray. The cut side will be the part of the bed that touches the "floor." Lightly sand (or in our case, since we had no sandpaper handy, scrape with a utility knife) JUST the two surfaces that will be touching. This will help the wood glue to hold. Use a thin layer of wood glue, then carefully nail one finish nail on either end for a sturdy hold.

STEP FOUR: Now for the headboard. Again, carefully sand or scrape the two surfaces that will be glued together. Your drawn line will be where you line up the TOP of the long tray. We glued and then used a staple gun to hold the headboard in place.
Allow the glue to dry!
 STEP FIVE:
 Now we're getting to the fun part -- the sewing!
I started by carefully removing the zipper (to save for a future project!) and then cutting along the seam lines of the pillow cover. Set your pillow cover fabric aside.
 STEP SIX:
 Make the bed skirt! Cut as follows:
Center piece: 11" x 4 1/4"
Ruffle pieces: Two rectangles, 14 1/2"
x 4"
Hem the two short ends of all pieces, and one long end of each of the two ruffle pieces, by turning the edges up 1/4" and sewing. Gather the raw edge of the two ruffle pieces a scant 1/4" from the edge. Attach to the long edges of the center piece. Your bed skirt should look like the photo.
 STEP SEVEN:
 Make the mattress! Cut two rectangles, 12 1/2" x 5 1/4". Sew
all the way around with a 1/4" seam allowance.

Open each corner as shown and sew a line 3/8" from the point, perpendicular to the seam line. This will box the corners of your mattress.

Cut a 6"-8" slit down one the center of one rectangle and turn it right side out. Carefully stuff with a stack of batting and whipstitch the opening closed.

Bed skirt and mattress? Check!
 STEP EIGHT:
 Make the comforter! Cut two rectangles, 9 1/2" x 13 1/2". Layer them right sides together and sew three sides, leaving one short side open. Trim the corners as shown and turn right side out. Carefully tuck the raw edges inside 1/4" and press. Topstitch all the way around, closing the opening as well. Done!
 STEP NINE:
 Make the pillow! Cut two rectangles, 5 1/4" x 3 3/4". Sew right sides together using about a 1/8" seam allowance, leaving a 2 1/2" opening on one short end. Turn right side out.

Topstitch right along the edge on the three finished sides, then 1/4" from your stitching line.

Stuff with another stack of batting. Carefully tuck the raw edges inside and topstitch the opening closed, then sew 1/4" from that stitching line.

Everything's done! Time to make the bed!
I topped my little bed with a tiny embroidered sachet that belonged to my grandmother. It makes a
perfect accent pillow!

Barbie is all set to relax and read a book!


 For today's
  Of course we had to have some fun decor -- so I bought a couple posterboards at the dollar store and cut out some minions for the walls. I found a bright yellow disposable plastic tablecloth at Walmart for a little over a buck, which I ended up cutting to fit not only my kitchen table but also two smaller picnic tables we brought in. Also found at the dollar store: bright blue paper plates, bright blue and yellow crepe paper streamers, and....
 ....SCORE! Scads of bright blue T-shirts in all the kid sizes I needed! I busted out one of my FAVORITE crafty supplies I always keep on hand: Transfer Magic's Ink Jet "Transfer to Dark" heat transfer paper. This stuff is THE BEST. I simply sized some minion images in Photoshop, crammed them all into a 8 1/2" x 11" file, and printed them out on one sheet of transfer paper. I cut them all out while I watched a movie, then ironed them onto the blue t-shirts. Bang! 20 T-shirts for about $22! It was SO FUN to see all the little party-going minions running around in their matching minion t-shirts!
 First a project-y sort of thing (you know I can't resist throwing in a creative project!): Cookie robots! My sister (thanks, Lol!) and I cooked this one up over the phone just a few hours before the party. When I went to pick up the cake (there IS a very cute Despicable Me cake available, hooray!), I also grabbed a bag of chocolate chip cookies, a box of Dots, a bag of stick pretzels and some cookie frosting. Ba-da-bing, cookie robots! Each partygoer got to come up with his or her own design. Fun and tasty!
 Another game: Gru Says!
 A beanbag-toss-type game: In the movie there is a scene at a carnival where the object of a carnival game is to knock over a spaceship to win a prize. In our modified version, I created a cutout posterboard version of the spaceship, taped it to the wall, and stacked some plastic cups in front of it.
 Each boy had a chance to toss


