Showing posts with label decor. Show all posts

Tuesday, October 5, 2010

Lighted Skulls -- a Recycle Project!

I'm over at Dollar Store Crafts today with a quick, easy, CHEAP project for Halloween. This project only takes a couple minutes! Then, once you learn the basics of how to make these little guys, head back over here for a bonus project idea:


To make this version, all you need is a small string of twinkle lights (mine was a 20-light strand) and a utility knife. Simply cut a small X in the top of each skull and pop the lights in. I put my skulls on every other bulb, but every third would work well too. Easy!


Hey, while you're at it, remember this project from last year?

It continues to be one of my favorites! Check it out, and try it!

Tuesday, July 20, 2010

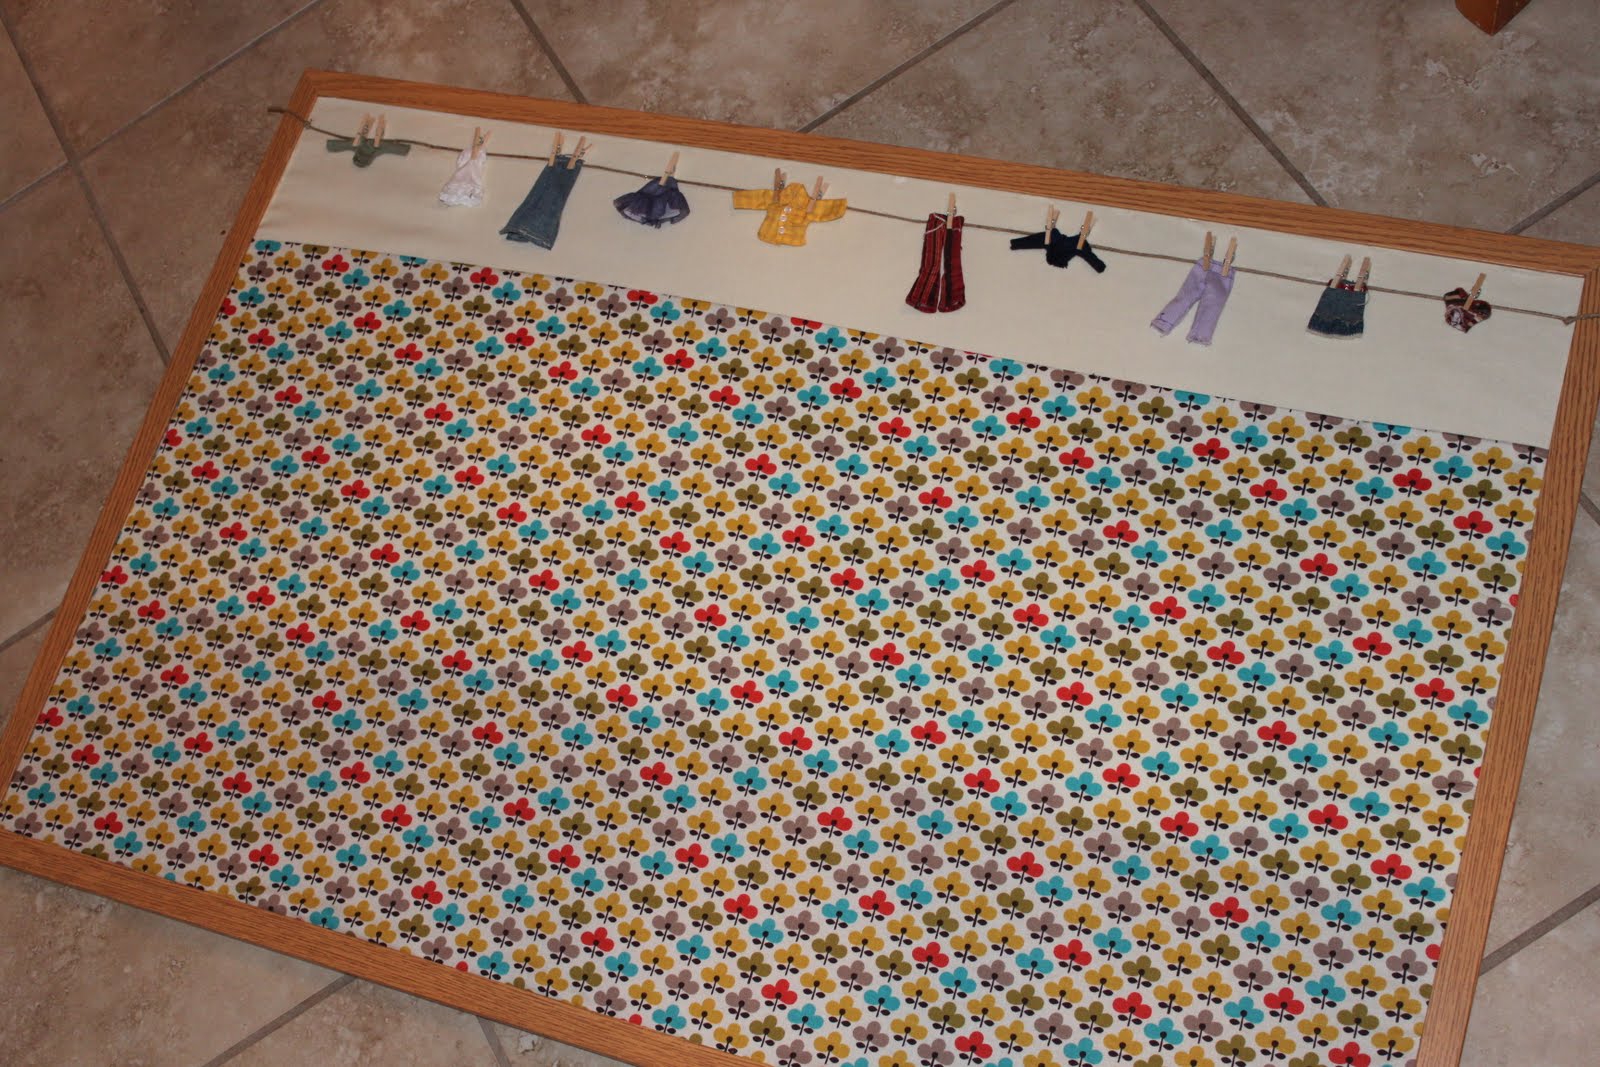
Doll Clothes into DECOR

Today's Dollar Store Craft is ridiculously easy, yet ridiculously cute!


Take some cording (mine is hemp jewelry cording), mini clothespins, and a pile of fashion doll clothes...


...and create a little "clothesline" decor! I did stick a few pins into the clothesline itself behind a few of the clothing pieces to prevent the line from sagging.


I put mine on my sewing room bulletin board, but I could see this in a tween's room as a decorative border. There is a slightly larger size of clothespin, too -- wouldn't it be cute in a little girl's room with some sweet baby doll dresses?


I actually have one I made years ago in my laundry room -- I even sewed each custom piece of clothing. It's a fitting place for a little cheerful decor!

Easy and cute!

Thursday, June 17, 2010

Rubik's Cube -- The Ottoman!

Project #2 in my Rubik's Cube series!


Yes! It's true! I upsized my Squishy Rubik's Cube into a 16" ottoman! I created it for my brother J. Clark's birthday. (He can actually SOLVE The Cube! Well, not this one -- a functional one!)


What You Need:

~ Rubik's cube (for reference)
~ stickers (for labeling your cube)
~ 14.5" ottoman (you can adjust measurements to fit any cube ottoman)
~ 1 yard black cotton duck cloth -- prewashed, dried, and pressed!
~ 1/8 yard fleece in each of the colors: red, yellow, green, blue, orange, and white
~ 1 1/2 yards fusible webbing (I used the "light" version)
~ glue stick
~ clear monofilament thread


STEP ONE: Cut your duck cloth. I cut five 15.75" squares.
Here's the breakdown: Sewing on all the colored squares takes up some of the give in your fabric. I added a total of 1.25" to the original measurement of my ottoman, which was 14.5". For my ottoman, this was the perfect amount to end up with 1/2" seam allowances. Please note that you may need to adjust these measurements.


STEP TWO: Label your cube! Find an interesting configuration of the cube, then label five sides. You will not be creating the sixth side -- the bottom of the cube.


STEP THREE: Figure out how many squares of each color you need to cut. This is easy -- look at your sixth side and for each color subtract those squares from the original nine you would have if you were doing the entire cube.


STEP FOUR: Cut your fusible webbing into strips 4.5" wide. Fuse the appropriate amount (do a little math after figuring out how many squares of each color you need) to your fleece.


STEP FIVE: Using a ruler and a pencil, draw lines to create 4" squares on your fusible webbing.


STEP SIX: Cut them out!


STEP SEVEN: (I sewed four of my black squares into a row using a 1/2" seam allowance before laying out and fusing my colored squares, but you can do what makes the most sense to you.) I created a paper template to make my layout as accurate as possible. To fuse: After peeling the paper backing from each square, use a glue stick to temporarily hold the squares in place.


Gently remove the paper template,


carefully turn the whole thing over, and press from the BACK. (You cannot get enough heat to the fusible webbing when pressing from the front of the fleece.)


STEP EIGHT: Using monofilament thread, sew along the edges of the squares. I simply sewed a series of straight lines all the way through each row. Since the thread is clear, there is no need to stop and start at the end of each fleece square.


STEP NINE: Complete construction of your ottoman cover much the same way as the I-Spy Blocks/Storytelling Dice, steps 6 and 7 -- except you are adding the top, not the bottom.

STEP TEN: Put your cover on your ottoman and pin the hem. Carefully press around the pins.


STEP ELEVEN: Tuck the raw edge in all the way to your pressed edge and sew close to the upper fold.


Your cube is complete! Kick your feet up on it, bust out your original Cube, and let the geekiness begin!

Monday, April 12, 2010

Shirred Pillow Tutorial


I've recently realized that I love TEXTURE. I've been experimenting with many ways of creating texture with fabric. This shirred pillow showcases one of my very favorite textures -- gathers galore! Why shirring? Because I wanted as many lines of gathers as possible, but without having to actually do any gathering myself! AND, with elastic thread, all your gathers are ensured to be perfectly even!

My instructions are for a 16" square pillow cover, but you could adjust the measurements to fit any size. Here we go!

What you need:
~ 16" pillow form
~ One yard fabric of your choice
(a solid-color fabric that is not too heavy works best for this pillow. I used a cream quilt-weight cotton.)
~ Elastic thread
~ Disappearing ink marker
~ long ruler or yardstick
~ spray bottle
~ iron
~ your sewing machine, of course!

PREPARATION:

Cut your fabric as follows:
one 17" square
two 17" x 12" rectangles
one 18" x 30" rectangle

Load your BOBBIN with the elastic thread:
You will need to wind the elastic thread onto your bobbin by hand, being careful not to stretch the thread. (Sounds like a huge pain, but it goes quickly!) You will definitely need more than one bobbin of elastic thread.


Hem one long edge of each of your two 17" x 12" rectangles:
Press the edge down 1/4", then 3/4" and hem.

Mark lines the long way on your 18" x 30" rectangle in 1" increments, as shown.


You're ready to sew!


STEP ONE: Set your machine's stitch length to about 4 1/2. With your elastic thread loaded in the bobbin and a thread to match your fabric loaded in the top, begin sewing along your marked lines. Be sure to backstitch at the beginning and end of each line! When I get to the end of a line of shirring, I like to turn the fabric around and sew the next line the other direction. This minimizes waste on the elastic thread, and also means I don't have to clip threads until I am completely done with the shirring. Be sure to stretch your fabric flat in front of the needle as you sew.


Shirred!


STEP TWO: Spray your lines to make them disappear. You want them to be GONE before you press, since ironing over your disappearing ink may make it permanent!


STEP THREE: You need to press your fabric while it's wet to shrink up your elastic a little more and create even more texture. Pin one end to your ironing board, spreading it as flat as possible.


STEP FOUR: S-t-r-e-t-c-h your fabric flat ahead of your iron and press. (Don't you love my old-school iron? I could never replace that baby!) Once you've steamed all the water out of your fabric, you're done!


STEP FIVE: Lay your 17" square on a flat surface. Layer your shirred fabric on top (elastic side DOWN -- that's the back!) and pin one side as shown. Your shirred fabric will be scrunched up smaller than your 17" square. *Note that, pre-shirring, your fabric was 18". This was intentional, as the shirring will take up just a little bit of that width. Just make sure you are lining up one edge (in my case, the top) with the edge of your 17" square.


STEP SIX: Sew your pinned edge with a 1/4" (or less) seam allowance. Make sure those raw edges line up nicely!


STEP SEVEN: Repeat for the opposite side.


STEP EIGHT: The purpose of the second layer of fabric is to stabilize the stretchiness of the shirred layer. You now need to sew the top and bottom edges of your layers together. Pin your fabric to your ironing board, stretching it so that the 17" square underneath is flat.


Pin the two layers together at the top and bottom. Stretching the top fabric to exactly the width of your square will mean you have perfectly even gathers all the way across.

Carefully sew, again using a 1/4" (or less) seam allowance.
(*Note: When you sew the one edge that doesn't match up exactly to your square, sew it from the BACK to ensure you are making your square a finished 17" -- then trim away that little bit of excess fabric on the front.)


STEP NINE: I decided to tack my two layers together in four places on my pillow top. I used pints to mark where I wanted to tack...


...then carefully sewed a back and forth a few stitches right on top of the shirring, stretching all those gathers out of the way. The tiny little tack marks will hide in all those gathers.

Your pillow top is done -- now you just need to add the back!


STEP TEN: This is an envelope-style pillow cover, which means you don't need any piping, binding, zippers, or handstitching to finish it off! Lay your pillow top right side UP on your ironing board, again pinning it flat. Layer each rectangle on top, right side DOWN, with the hemmed edge towards the middle and the raw edges along the outside edges. Pin.


STEP ELEVEN: Sew all the way around, using a 1/2" seam allowance.
Turn it right side out and TRY IT on your pillow form to check for fit!


If it fits, go ahead and serge or zigzag your raw edges. You are FINISHED!


TA-DA!! Gorgeous!


I just LOVE all that yummy texture, and can't stop myself from running my hands over it just to feel it!

Monday, March 8, 2010

Flower Party Decor -- Dollar Store Style!

I'm so excited about Spring! I went outside with the boys this morning and discovered that my daffodils are blooming! HOORAY!! Signs that warmer weather really is coming!

With that in mind, today I'd like to share what I came up with for my Dollar Store Crafts post this week -- flower-themed party decor!


First, my favorite -- the Happy Birthday banner!


I used pre-cut craft foam flowers and craft foam sheets, both found at my local dollar store.


I lined up 14 flowers in a pleasing color configuration and fed them through my sewing machine, connecting them all. I was pleased that the craft foam sewed up so well! I used a slightly longer stitch to avoid perforating and tearing the flowers, and sewed through the upper portion of each flower so they would all hang upright.


LOVE those bright, springy colors!


I then cut circles for each center, and freehanded letters to spell "Happy Birthday" -- with one blank flower between the two words. I used plain old tacky glue to adhere them together. Done!


I can't tell you how happy this bright banner makes me!


Next up: Pool noodles! I busted out my trusty electric knife and cut my pool noodles in 3/4" slices. Aren't they just delightful? They would be SO pretty just floating in a pool as decor -- or even as packing material, in place of those boring packing peanuts!

Here's what I used them for:


I took a couple pool noodle flowers, some acrylic paint (you can find some like mine at the dollar store if you don't have any on hand -- I didn't!), and a roll of plain wrapping paper, and used the noodle flowers as stamps.


Ta-Da! Fabulous wrapping paper or table covers! (Mine is still wet and wrinkly in the photo.) Stamping like this is a super fun project for kids, too!


I then took a few more of my pool noodle flowers, a kitchen knife, and some straws...


...and made a cute little centerpiece...


...which doubles as straws for thirsty partygoers!
(And check out my leftover-craft-foam-flower coasters!)


Then, last but not least, my pool noodle flower garland. I cut a few slices of a green pool noodle, then cut the "petals" apart to create little green circle "leaves" to go in between the flowers. I tried stringing them two different ways -- one with strong quilting thread, and one with yarn. The yarn version worked much better. I used a regular-length, large-eyed needle, which worked okay because you can squish the noodle flowers over the needle to make it work. Or, to make it a little easier on yourself, you could certainly use a super long tapestry needle.

I love all of it -- especially that banner! I am really looking forward to spring; it was so much fun to work on something bright and fun to get me even more in the mood for warmer weather!