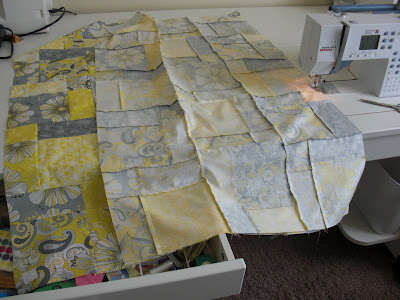
 Lay out all your rows on the floor, in order. (I'm only showing my first two rows here.) You will sew together two rows at a time, matching up seams and "finger pinning" as before to get the corners of your blocks to line up. It is easiest to press after sewing each seam rather than after the entire top is together.
Having trouble matching up those seams? Let me show you how to "fudge" them!
 Match up your seams, "finger pinning" as you've done before.
 This one really isn't matching up -- look how much excess fabric there is on the lower layer versus the upper layer! I really want my seams to match up, so I'm going to do my best to make it happen.
Hold your finger where the two seams should be matching up. Continue sewing, but give a little resistance where you are holding your seams, stretching a little as you sew. You should be able to gently ease the two layers together -- and if they still don't match perfectly, at least they will be close!
 It's working!!
 Here's the point where I was having trouble... matching up perfectly after just a little bit of tweaking!
 After sewing and pressing your rows into pairs, sew 1-2 to 3-4 and 5-6 to 7 and press. You now have two halves to sew together.
 A quick tip: Your quilt top is getting quite large, and a little bit unwieldy. You can make it a little easier to handle when sewing those two halves together by enlarging your sewing area. I simply open the top drawer of my sewing table to hold up some of the quilt, but you could also set up a TV table or card table to the left of your machine. The weight of the quilt will be distributed a little better, enabling you to get your quilt top through the machine without having to fight it as much. (You will DEFINITELY want to use the same trick come quilting time!!)
 Your quilt top is ready for borders!

9 comments:
Darn, I got behind! (Got distracted by your cute little t-shirt peasant top tutorial and had to have one for myself). I need to put my rows together tonight so I can catch up!
I absolutely love the colors of this quilt-to-be. I haven't started my very first quilt yet. Working on my very first dress right now. And Laundry week over at Honeybeebzz.blogspot.com
But I am bookmarking these great lessons! thanks for the step by step how to
Yay! You have no idea how anxious I was yesterday because my rows were sitting there oh so pretty, just waiting to be sewn up!
Really good tips! Thanks.
This is great. I made a disappearing 9 patch for my first quilt ever 2 years ago. I love all the examples, I did not realize you could do so many different looking quilts with it.
So excited to continue on. Had to take a break and keep the kids up on their schoolwork and HAD to clean house!!
yay! This step done! I'm getting there...though slower than the rest of the group. :)
Ack! I actually did it. There's one spot of gingham that isn't as straight as it should be, and I used my seam ripper more than the sewing machine- but it is done!
I love this tutorial. I am almost done with my third quilt top using this tutorial. I should be ready to start quilting the first one this week.
Post a Comment