

Let's finish our nine-patches!
First we need to talk about pressing....
There are two schools of thought with regard to pressing seam allowances in quilts. The traditional method is to press all seam allowances to the side. Recently more and more quilters are pressing seams open. I have tried both methods. There are certain instances where pressing open works best for distributing bulky seams, but for the most part it's all a matter of preference!
For this quilt I am going to show how to press seams to the side.
 Start with one of your nine-patch stacks of three rows. Place them along the far edge of your ironing board.
 Flip the top row down, keeping the left square at the left, and the right square at the right. You are going to press your seam allowances to the left, as shown.
Be careful not to stretch and distort your fabric as you press -- it is best to lift and press your iron, not set it down and use a side-to-side motion.
 Once you've pressed from the back, flip your row back over again -- keeping the left square at the left and the right square at the right -- and press from the front. Set it aside.
 Flip down row 2 the same way, this time pressing the seam allowances to the right. Layer row 2 on top of row 1.
Repeat for the row 3, pressing the seam allowances to the left.
(If you haven't caught on yet, the idea is to alternate the direction you press the seam allowances for each row.)
 Stack and stagger your rows grouped together in blocks as you press.
 It's time to complete your nine-patch blocks!
Lay out one block next to your machine. If it will help you remember the order of your rows, go ahead and label them as shown -- 1-1, 1-2, 1-3 (meaning block 1 - row 1, block 1 - row 2, block 1 - row 3).
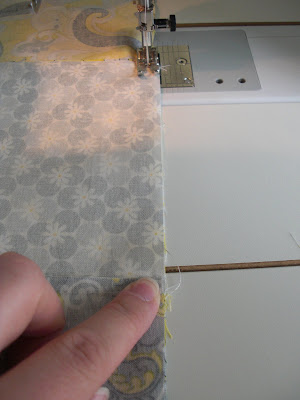
 Lay rows 1 and 2 right sides together. Take a few stitches using a 1/4" seam allowance and stop.
 At the first seam you will be matching up, take the two seam allowances between your fingers and fiddle them it until they lay flat -- the seam allowances face opposite directions to help you match those seams!
 Carefully lay the seams down and gently hold the seams together with your finger.
 Sew, holding your finger gently on that seam allowance. This is referred to as "finger pinning."
 Sew until you reach your matched up seam allowance and stop. Match up the next seam allowance the same way, and stop once your needle has reached it.
 Match your bottom corners and hold them together until you've made it all the way through your block. Done! And with no pinning!
 Open rows 1 and 2, and layer row 3 on top.
 When you are sewing different-sized pieces together, you want to have the smaller piece on top -- it is easier to manage your pieces this way.
Sew this row onto your block using the same finger pinning technique.
 Once you've sewn your 9 nine-patches together, press the seam allowances from the back and then from the front. I press both seams in the same direction -- it doesn't matter which way.
Your nine-patches are complete, and you're ready for the next step!
Start with one of your nine-patch stacks of three rows. Place them along the far edge of your ironing board. Flip the top row down, keeping the left square at the left, and the right square at the right. You are going to press your seam allowances to the left, as shown.
Be careful not to stretch and distort your fabric as you press -- it is best to lift and press your iron, not set it down and use a side-to-side motion.
 Once you've pressed from the back, flip your row back over again -- keeping the left square at the left and the right square at the right -- and press from the front. Set it aside.
 Flip down row 2 the same way, this time pressing the seam allowances to the right. Layer row 2 on top of row 1.
Repeat for the row 3, pressing the seam allowances to the left.
(If you haven't caught on yet, the idea is to alternate the direction you press the seam allowances for each row.)
 Stack and stagger your rows grouped together in blocks as you press.
 It's time to complete your nine-patch blocks!
Lay out one block next to your machine. If it will help you remember the order of your rows, go ahead and label them as shown -- 1-1, 1-2, 1-3 (meaning block 1 - row 1, block 1 - row 2, block 1 - row 3).
 Lay rows 1 and 2 right sides together. Take a few stitches using a 1/4" seam allowance and stop.
 At the first seam you will be matching up, take the two seam allowances between your fingers and fiddle them it until they lay flat -- the seam allowances face opposite directions to help you match those seams!
 Carefully lay the seams down and gently hold the seams together with your finger.
 Sew, holding your finger gently on that seam allowance. This is referred to as "finger pinning."
 Sew until you reach your matched up seam allowance and stop. Match up the next seam allowance the same way, and stop once your needle has reached it.
 Match your bottom corners and hold them together until you've made it all the way through your block. Done! And with no pinning!
 Open rows 1 and 2, and layer row 3 on top.
 When you are sewing different-sized pieces together, you want to have the smaller piece on top -- it is easier to manage your pieces this way.
Sew this row onto your block using the same finger pinning technique.
 Once you've sewn your 9 nine-patches together, press the seam allowances from the back and then from the front. I press both seams in the same direction -- it doesn't matter which way.
Your nine-patches are complete, and you're ready for the next step!
8 comments:
I love that you are doing this. Many times I have thought about making a quilt, but had no idea where to start. Here is my progress so far http://choosethewhite.blogspot.com/2010/04/my-first-quilt.html
Thanks for the series. I'm learning a lot. I wish I had the advice when I recently finished my first ever quilt. My next one will be a lot better now though!
Okay--I think I'm ready to tackle this step--if I make it through the pressing technique--LOL! My big concern is making sure I can get the seams to line up. Probably gonna take me a day or two to get it done.
Just organized my rows of three yesterday and I'm excited to start putting things together.
SLOW DOWN! WAIT FOR ME! :) I'm just sewing my lines of three together tonight!
I love this idea for a quilt and I want to make one for my daughter's "big girl" bed (double/full). How much material do you think I should buy and what size quilt would that much material make? HELP!!!
ooh, the pressing seems daunting...but tomorrow I will be working more on this baby!
I pressed side to side 1st go around. Today I'm going to try pressing open.
Post a Comment