

I am so excited to take part in Spice Up Your Kitchen with Anna at Noodlehead! I ~love~ Anna's blog, and she is a great bloggy friend. I highly recommend checking out her projects -- especially her zippy wallet, which I have made numerous times (addicting!!), and her GENIUS drawstring backpack, which is on my to-make list!
For my kitchen-y project, I chose to do a (very!) little something to spice up the fridge.
For my kitchen-y project, I chose to do a (very!) little something to spice up the fridge.
 How about the cutest little tiny oven mitts ever??
They're magnets!
Here's what you need:
~ Fabric scraps -- main fabric and trim fabric
(you literally only need a few inches of fabric!)
~ Scrap of cardstock
~ small magnet
~ chopstick or other pointy object for turning
~ hot glue gun
 STEP ONE: Pick your fabric. I had a ridiculously good time pawing through my ridiculously tiny little I-Spy fabric scraps!
 STEP TWO: Create your pattern. I looked at one of my own oven mitts and drew up a quick little pattern. (This photo shows my pattern on standard graph paper -- 1/4" squares.)
 STEP THREE: Cut a window of your pattern from your scrap of cardstock so you can "audition" your scraps for motif placement.
 STEP FOUR: Once you've decided on a motif you like, flip over your fabric and your window and trace the pattern on the back of your fabric, using a pencil.
 STEP FIVE: Trim your fabric parallel to the top edge of the mitt, a scant 1/4" from the line.
 STEP SIX: Turn your mitt fabric right side up and layer your trim fabric scrap face down on top, aligning the fabrics on the edge. Sew, using a scant 1/4" seam allowance. Repeat using more scraps for the opposite side of the oven mitt. (No need to center a motif on the back side of the mitt -- no one will ever see it!)
 STEP SEVEN: Press your seam allowances toward the trim fabric.
 STEP EIGHT: Layer your two pieces right sides together, aligning the seam lines as shown.
 STEP NINE: Shorten your stitch length and sew on your pencil lines, starting and stopping about 1/2" inside the trim fabric.
 STEP TEN: Trim close to your stitching line and clip around curves. Be sure to clip right up in the corner where the thumb and the rest of the mitt meet so the thumb will turn correctly.
STEP ELEVEN: Gently turn the mitt right side out. Use a chopstick or other "pointy yet blunt" object to carefully poke out the thumb.
 STEP TWELVE: Use a few scraps to "stuff" the mitt and give it the thickness it needs to look realistic. I fold a scrap over my chopstick...
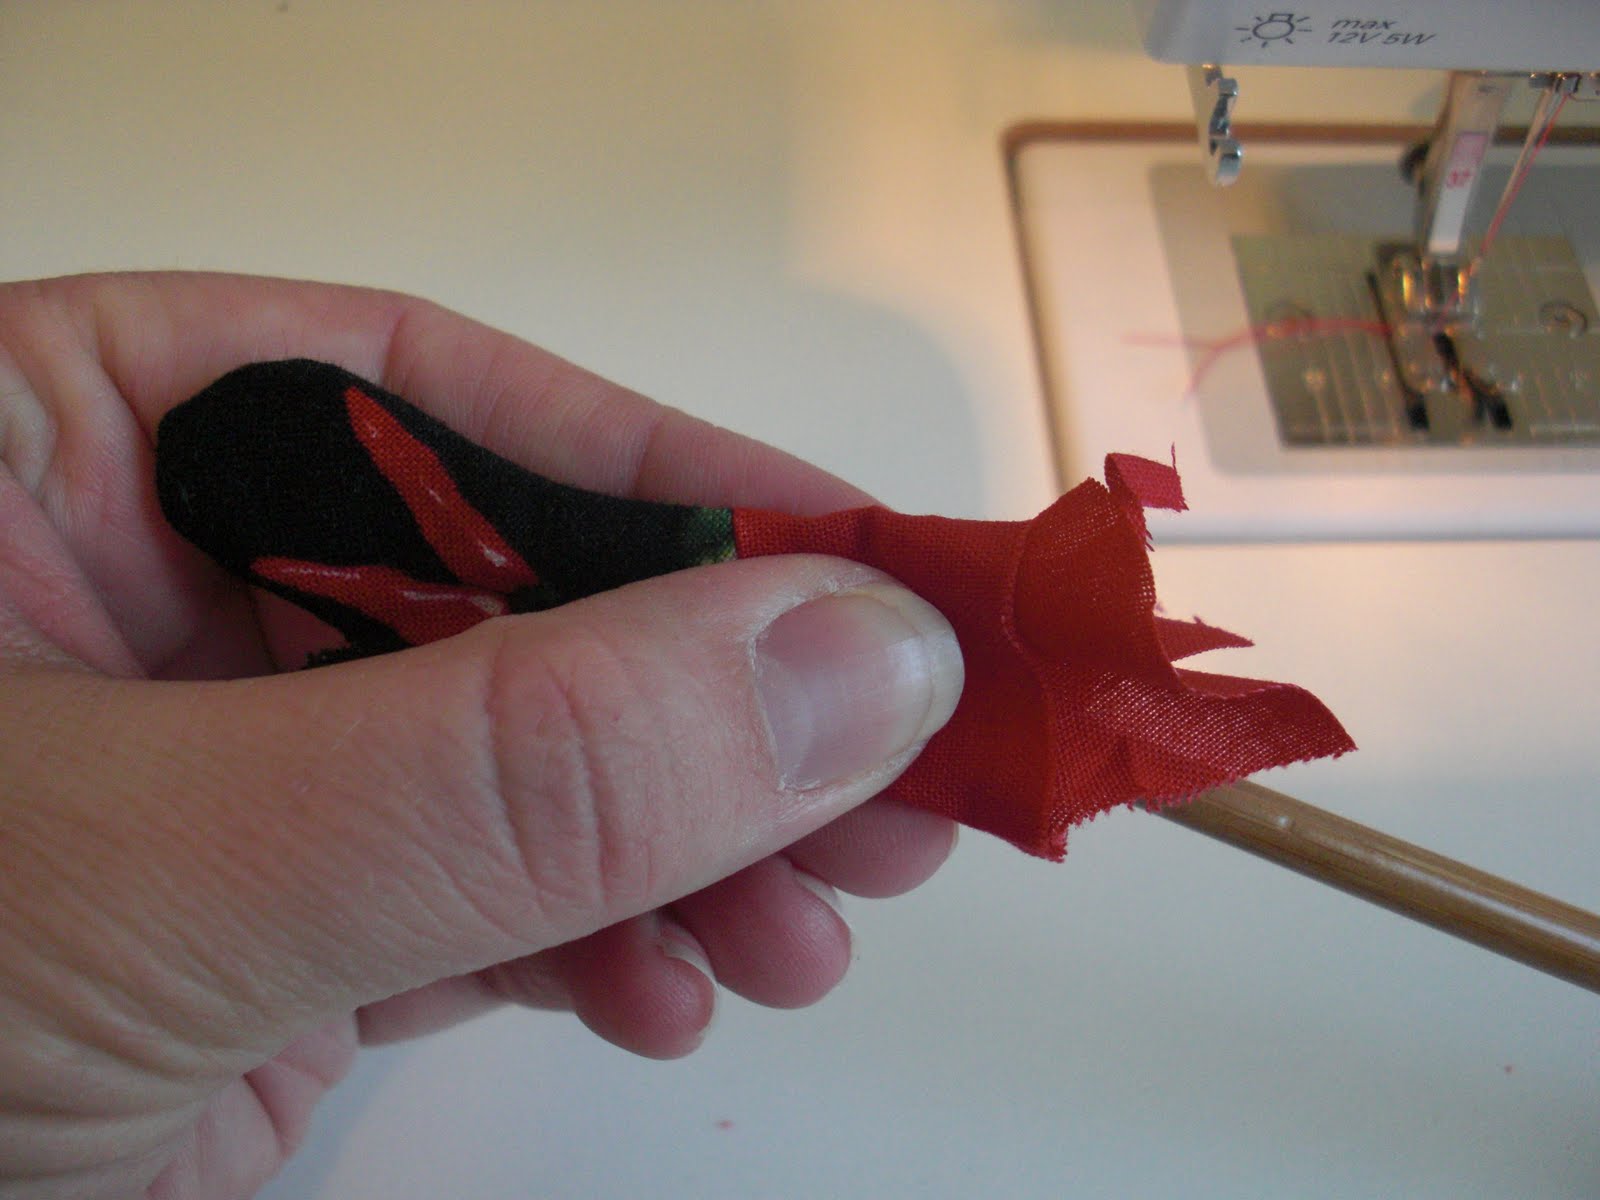 ...and gently poke it into the mitt, keeping it as flat as possible.
 STEP THIRTEEN: Trim the trim (ha!) to about 1/2",
 and tuck in the raw edges. Make the trim look as narrow and realistically-scaled as you can.
 STEP FOURTEEN: Press it flat!
(Awwww, look at the reflection of Kitty sleeping on her pillow on the ironing board!!)
 STEP FIFTEEN: Use some of your trim fabric to create a narrow strip for the oven mitt loop. Fold one edge as narrowly as you can, then fold again, and sew. Trim after sewing, as close to the stitching line as possible. I make it much longer than I need so that it is easier to hold and manage when sewing.
 STEP SIXTEEN: Fold your loop strip in half and attach to the top edge (same side as the thumb) with a needle and thread. I sew it to the corner, to only the back side of the mitt.
 STEP SEVENTEEN: Trim away the excess loop ends and hot glue a magnet to the back.
 DONE! It's ready to hold up your grocery list!
 *ahem* -- I may have gotten a little carried away with the itty bitty oven mitts! There were just TOO MANY cute options in my I-Spy scrap bin -- and they are so fun and quick to make!!
43 comments:
LOL! Those are just so durn adorable! I would have the same problem... getting carried away making several! LOVE it, thank you for this one!
Oh my gosh! These are the cutest things ever! I laughed out loud when I saw them. I can't wait to make a set of my own!
These are sooo cute, and a great way to use up little fabric scraps!
Que coisinha mais fofa!! Lindo mesmo!
oh now they are just too cute!!
Mum said she needed an oven mitt.... I should make and send one of these for a joke and the real one later when its done. ;) she will love it.
They are the sweetest magnets I have ever seen! Thanks for such a fun project.
This has to be the cutest fridge magnet ever! I can't wait to make one for my mom!
How cute are they ? very !! definetly have to give them a go. Thanks for sharing.
Oh my goodness! Those are SO adorable! I'm so making a set for me...and my mother.
Oh. My. These are SO. STINKIN'. CUTE. I've been saying that I want to give my fridge a make-over...
I linked to your tutorial on Craft Gossip Sewing:
http://sewing.craftgossip.com/tutorial-itty-bitty-oven-mitt-fridge-magnets/2010/05/25/
--Anne
These are so darn adorable! I'm logging this away for stocking stuffers this year. Thanks for the tutorial!
These are absolutely adorable! I love them!! Thanks for the great tutorial.
I think these are so cute.
adorable! love them!
These are fabulous. Thank you for the tutorial.
Carolyn
too cute!
So cute! Adding to my (rapidly growing) to do list....
You and your thing for all things "itty bitty"- these are very cute :)
This is so darn cute! It would make a great seller at our church bazaar. I like to make a few things to donate to church to fund their programs. I know everyone would be oohing and aahing over these. Thanks.
Leslie S. in MN
esclante [at] comcast [dot] net
This is the cutest thing I've seen in a long, long time. DARLING! Thanks so much, I'll be linking.
So clever....I'm addding it to my crafting list :)
Jana
Care you are amazing!!! What a fantastic (and adorable) idea! :)
What a cute job! I loved it, but it should be more difficult than to sew a bigger one, isn´t it?
I will be glad to received you visit, I´m writting from Brazil and I have a blog too www.marianepro.blogspot.com
They are adorable. I was going to make some new oven mitts, and some matching itty-bitty ones is such a cute idea. Thanks for the inspiration!
(and I'm a new follower now too!)
That is SO dang cute!!! I love it!
These are fantastic! I already have a bunch cut out and ready to sew.
I've featured this on my blog: http://www.boosie.ca
I have a hard enough time sewing regular sized things...this is amazing :) You must have the patience of a saint.
xo
They're so cute, but I know if I made some I would find them on my niece's dolls or something.
Oh Cute. I can see these as Mitten on the Christmas Tree. Oh nice class to have for the sewing Christmas in July.
Carol
ADORABLE! Love them!
{Rebekah}
Soooo cute, Care! I love these! You are brilliant beyond brilliant, always!
So great! Love them! Maybe a little small for me, but you did a great job!
a.DOR.able. I'm making these!
These are just too cute! I must make some!! *adds to massive to-do list*
So great!!!! I made apron christmas ornaments last year - these would be a great follow-on!
These are absolutely darling!! Thanks so much for the tutorial...I can totally see myself covering my fridge with them! lol
These are sooo wonderful. I am looking for magnets for our women's tea and these are just the thing! Thanks for sharing your idea.
Hi from Brasil!! Adorei seu trabalho!Tão fofos! Loved your work! Sooooo cute! Kisses
cok cici olmuş.
Hi, I've just done my mittens.
So cute!!
Thank you!
is beautiful.
Kursus HP
iPhone
Apple
Vivo
Les Private
Pot Holder And Oven mitt make work easy and simple it is very awesome.
Post a Comment