Monday, May 31, 2010

Dish Towel Superhero Cape

I have a pair of cute nieces who, when they come over, raid my dish towel drawer for "dress-ups." Apparently they find that dish towels make for lovely dresses, skirts, and capes! Well, when I saw some brightly-colored cotton dish towels (green, pink, and blue) at the dollar store last week, I knew immediately what they were destined to become!

What you need:

~ Two dish towels
~ small scrap of fusible webbing
~ 1 1/2" of sew-in velcro


It's simple to draft your own cape pattern. You can use a bib as a reference for the closure and neck width, as I did, and use the dish towel as a guide for length. I held the dish towel up to my daughter to check for the desired length. She is only one, so I made it shortish. As you can see, there is plenty of length to make it longer for an older child.

STEP ONE: Layer your two dish towels on top of each other and cut out your cape.


STEP TWO: Use a scrap from one of the dish towels to create a superhero logo. I found a font I really liked in Word, and printed it out to create my logo pattern. (My font is Blackoak Std, font size 240.) Trace the logo in reverse onto the paper side of your fusible webbing, fuse it to the wrong side of your fabric, then cut it out.


STEP TWO: Remove the paper backing, find a placement you like, and fuse it in place!


STEP THREE: Layer your two cape layers right sides together and pin all the way around. (I am not normally a pinning advocate unless it is necessary -- and this time it is!) If you like, mark with your pins on one straight side where you want to stop and start to leave a hole for turning.


STEP FOUR: Sew! I used a generous 1/4" seam allowance.


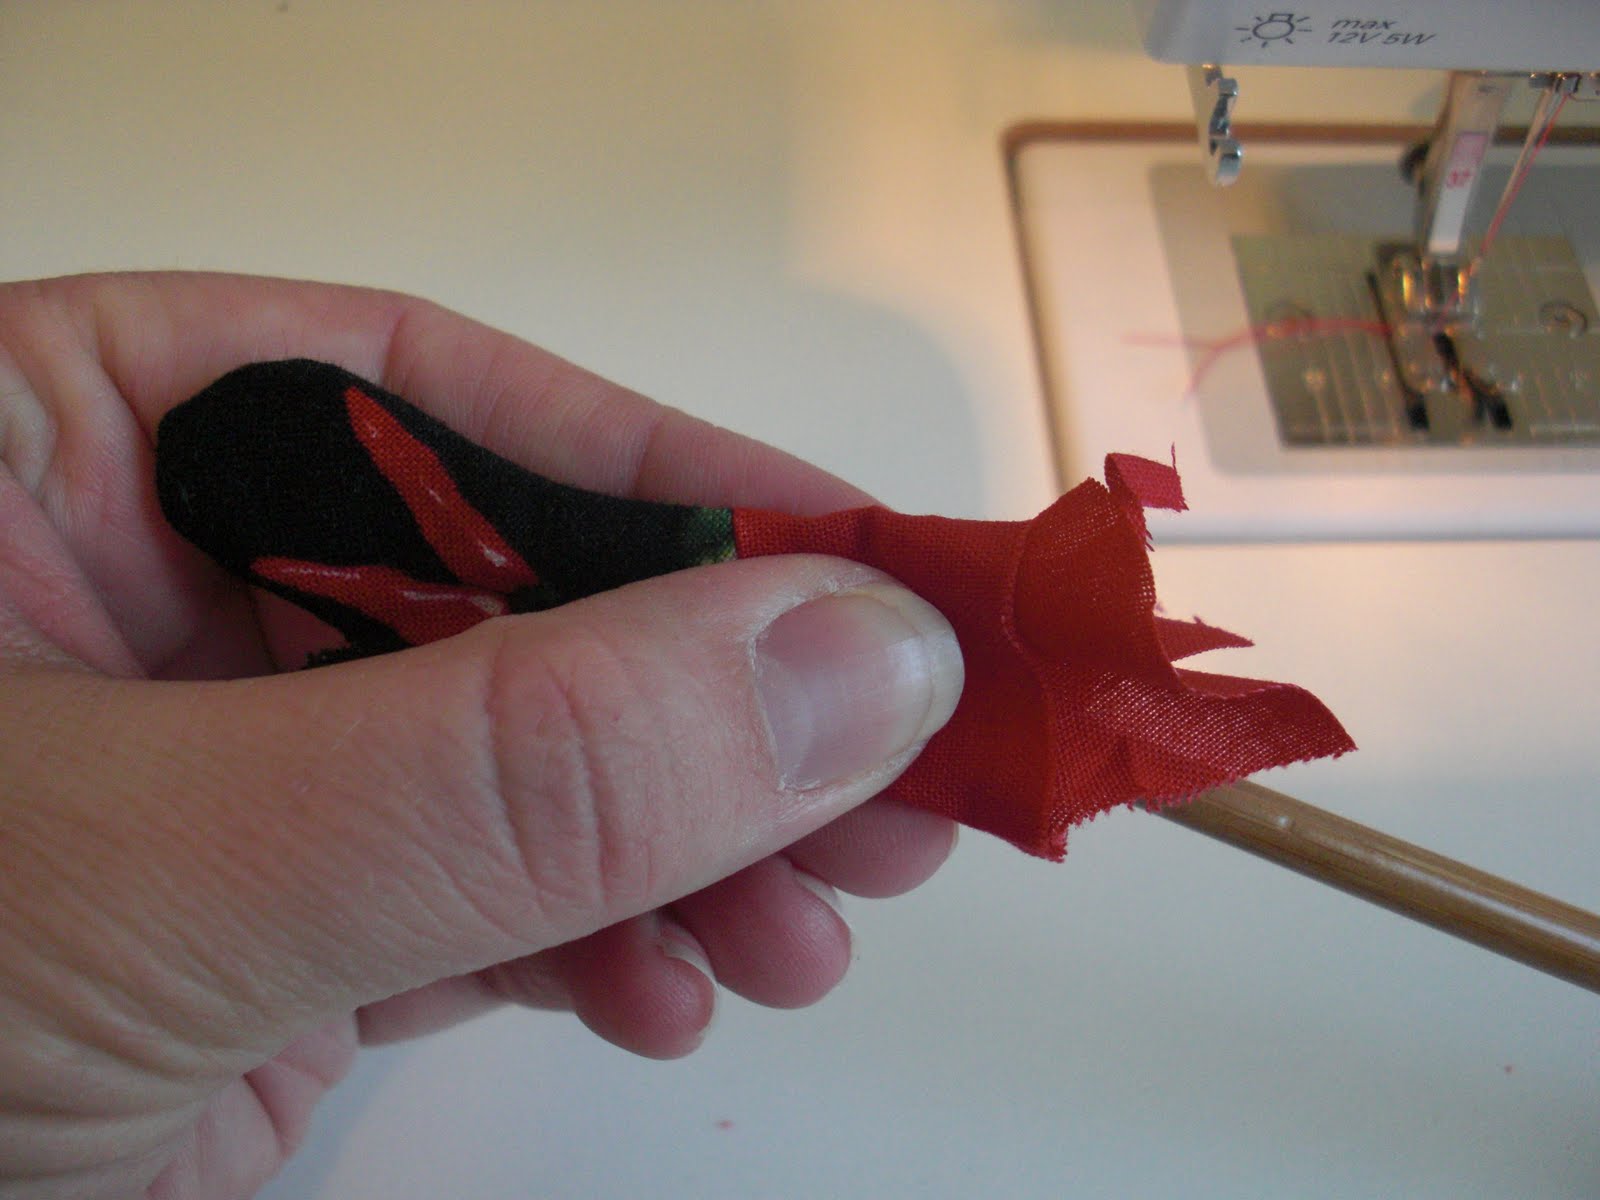
STEP FIVE: If you have pinking shears, now is a very happy time to use them! Pink around the curved seam allowances to allow for easier and flatter turning. If you don't have pinking shears, go ahead and clip around the curves right up close to the stitching line.

STEP SIX: Turn right side out through the hole, using a chopstick or other blunt-yet-pointy object to poke out the curves. Remember to poke the seam allowances of your turning hole inside. Press.

STEP SEVEN: Topstitch all around the edges. Lengthen your stitch for this part -- I increased mine to 4.


STEP EIGHT: Topstitch around the edges of your logo applique. (You could do this before sewing the two layers together if you prefer!)

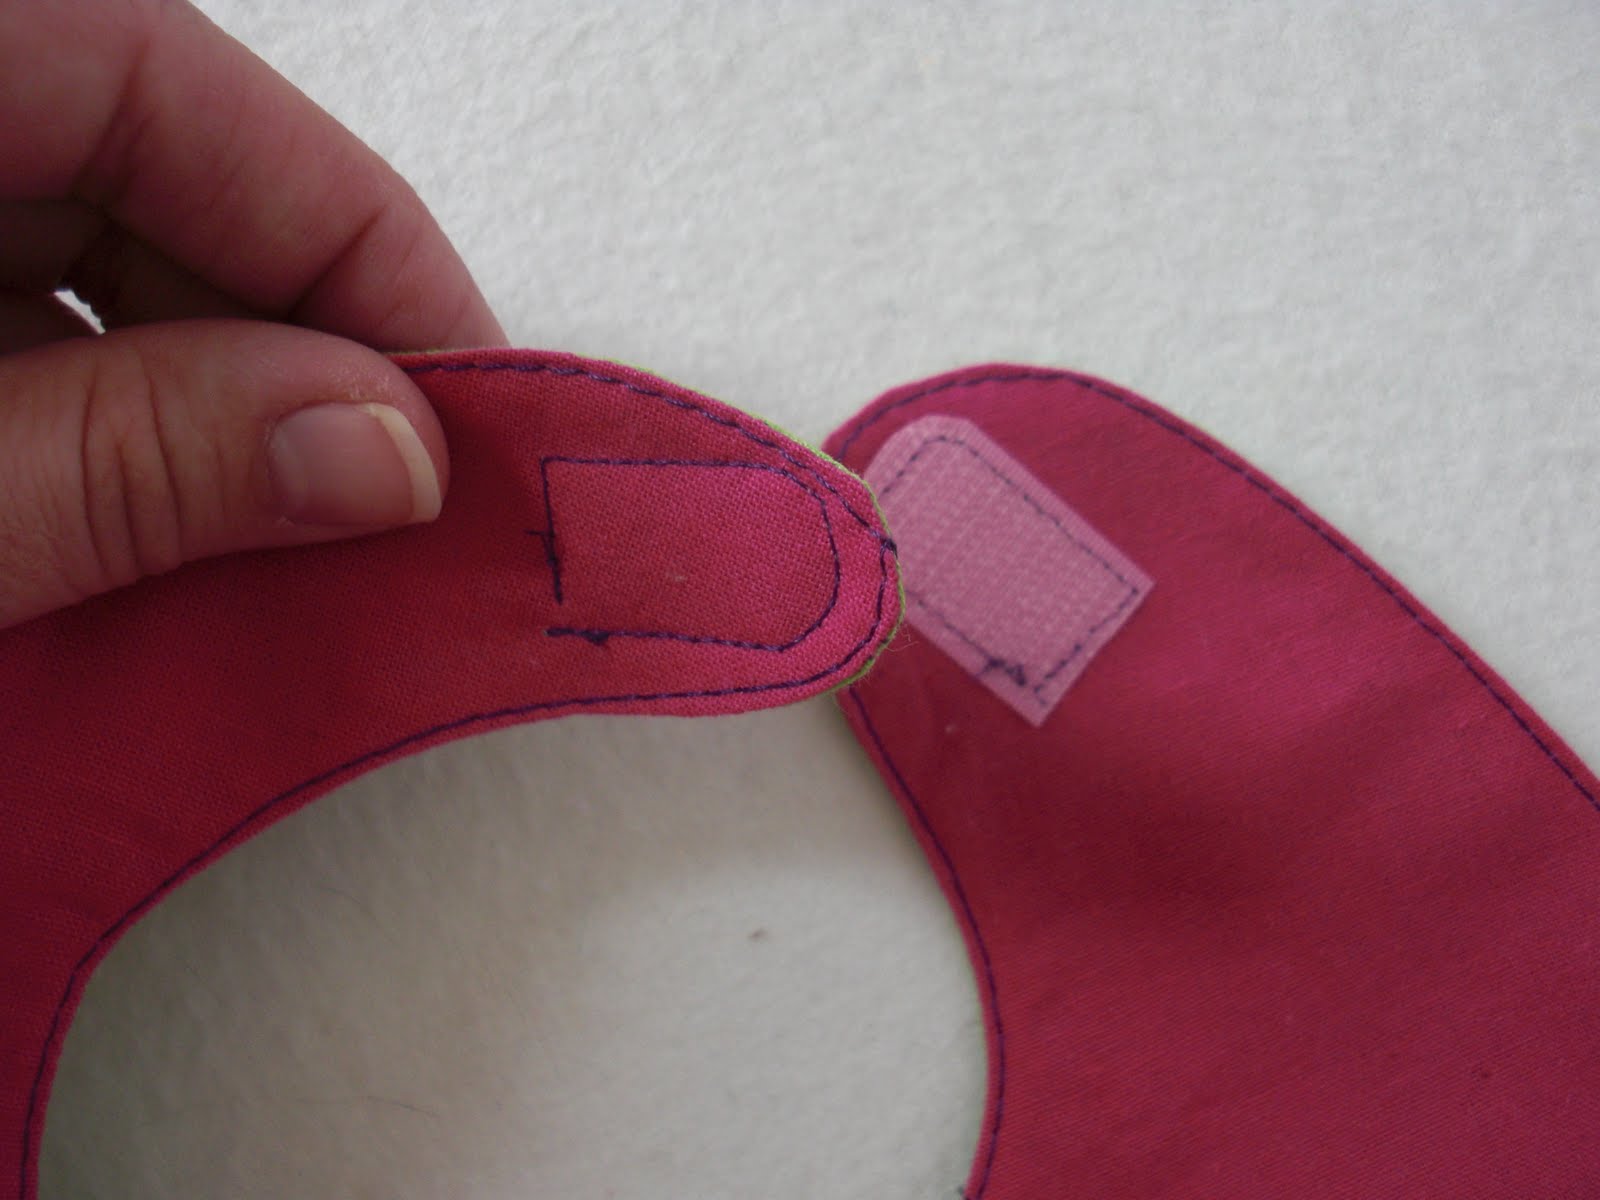
STEP NINE: Attach the velcro.


DONE!


Your little superhero will be flying around and fighting crime...


...or emptying the fridge?...

...in no time!

Thursday, May 27, 2010

I-Spy Swap: fabrics received!

from Cammie... I adore the grumpy owls and the cute little dresses, and my boys love the candy canes!


from Emily... She said she had a hard time narrowing her choices down to just 10, so she sent 12! I've been eyeing those French chickens for months. I'm so happy to see them show up in a swap! And the dancing lobsters! :o)


from Jodi... I love every single one of these, and with the exception of just two I have never seen any of these before! I especially love the pencils and rulers, and the HOSES!


from Margaret... I haven't seen those tools before (LOVE!), and those airplanes are too fun! And of course the maple leaves!


from Susie... Those shoes are just adorable, and I am loving the condiments. My boys are all over the BOWLING!


Keep them coming, swappy ladies!
I am excited to see what else everyone has found, and to get them all sent back out!

Wednesday, May 26, 2010

1st Quilt Ever Show Details(ish)

Okay, I have taken the plunge and set a date for the 1QE Quilt Show.

Monday, June 14th!

That gives everyone about 2 1/2 weeks to finish up their quilts (or make another one... hee hee!) and it gives ME a little time to finish up some of my other obligations! Win-win, right? I hope so!

For everyone who has already emailed me to say you're either done or very close, I will send out an email with the information I'd like in the next day or two. If you haven't emailed me yet, my email address is:

stitchwhipped{at}gmail{dot}com

Send me an email so I know you're interested in participating!

1st Quilt Ever Quilt Show... Call for Submissions!

Tiny little reminder!

THE SHOW CANNOT GO ON WITHOUT YOU!

If you participated in 1st Quilt Ever, and have completed (or are soon to complete!) a quilt you'd like to enter in my little blogland quilt show...

Please send me an email at

stitchwhipped {at} gmail {dottydot} com!!

I'd like to get some quick numbers of how many participants there are, as well as a little bit of information about your quilt.


Can't wait to hear from you!

Monday, May 24, 2010

Itty Bitty Oven Mitts!


I am so excited to take part in Spice Up Your Kitchen with Anna at Noodlehead! I ~love~ Anna's blog, and she is a great bloggy friend. I highly recommend checking out her projects -- especially her zippy wallet, which I have made numerous times (addicting!!), and her GENIUS drawstring backpack, which is on my to-make list!


For my kitchen-y project, I chose to do a (very!) little something to spice up the fridge.


How about the cutest little tiny oven mitts ever??
They're magnets!

Here's what you need:
~ Fabric scraps -- main fabric and trim fabric
(you literally only need a few inches of fabric!)
~ Scrap of cardstock
~ small magnet
~ chopstick or other pointy object for turning
~ hot glue gun


STEP ONE: Pick your fabric. I had a ridiculously good time pawing through my ridiculously tiny little I-Spy fabric scraps!


STEP TWO: Create your pattern. I looked at one of my own oven mitts and drew up a quick little pattern. (This photo shows my pattern on standard graph paper -- 1/4" squares.)


STEP THREE: Cut a window of your pattern from your scrap of cardstock so you can "audition" your scraps for motif placement.


STEP FOUR: Once you've decided on a motif you like, flip over your fabric and your window and trace the pattern on the back of your fabric, using a pencil.


STEP FIVE: Trim your fabric parallel to the top edge of the mitt, a scant 1/4" from the line.


STEP SIX: Turn your mitt fabric right side up and layer your trim fabric scrap face down on top, aligning the fabrics on the edge. Sew, using a scant 1/4" seam allowance. Repeat using more scraps for the opposite side of the oven mitt. (No need to center a motif on the back side of the mitt -- no one will ever see it!)


STEP SEVEN: Press your seam allowances toward the trim fabric.


STEP EIGHT: Layer your two pieces right sides together, aligning the seam lines as shown.


STEP NINE: Shorten your stitch length and sew on your pencil lines, starting and stopping about 1/2" inside the trim fabric.


STEP TEN: Trim close to your stitching line and clip around curves. Be sure to clip right up in the corner where the thumb and the rest of the mitt meet so the thumb will turn correctly.


STEP ELEVEN: Gently turn the mitt right side out. Use a chopstick or other "pointy yet blunt" object to carefully poke out the thumb.


STEP TWELVE: Use a few scraps to "stuff" the mitt and give it the thickness it needs to look realistic. I fold a scrap over my chopstick...


...and gently poke it into the mitt, keeping it as flat as possible.


STEP THIRTEEN: Trim the trim (ha!) to about 1/2",


and tuck in the raw edges. Make the trim look as narrow and realistically-scaled as you can.


STEP FOURTEEN: Press it flat!
(Awwww, look at the reflection of Kitty sleeping on her pillow on the ironing board!!)


STEP FIFTEEN: Use some of your trim fabric to create a narrow strip for the oven mitt loop. Fold one edge as narrowly as you can, then fold again, and sew. Trim after sewing, as close to the stitching line as possible. I make it much longer than I need so that it is easier to hold and manage when sewing.


STEP SIXTEEN: Fold your loop strip in half and attach to the top edge (same side as the thumb) with a needle and thread. I sew it to the corner, to only the back side of the mitt.


STEP SEVENTEEN: Trim away the excess loop ends and hot glue a magnet to the back.


DONE! It's ready to hold up your grocery list!


*ahem* -- I may have gotten a little carried away with the itty bitty oven mitts! There were just TOO MANY cute options in my I-Spy scrap bin -- and they are so fun and quick to make!!

Thursday, May 20, 2010

I-SPY QUILT WINNER!

884 comments!! WOW!!

And who is the winner?

Random.org says...

...who is...

I have emailed you, Gloria!

THANK YOU everyone, for entering! It's been so much fun!

Monday, May 17, 2010

Silk Flower Pins PLUS Bonus Project

Need something quick and pretty to dress up a gift card or present? Something that could be a secondary gift? This is just what you need! A quick, simple, INEXPENSIVE, pretty little pin!


SUPPLIES:

~ silk flowers (dollar store!!)
~buttons
~ pin backs ($1.30 for 10 at JoAnns)
~ tough scissors (I use kitchen shears)
~ hot glue gun

My flower pins ended up costing about $0.25 each!!

STEP ONE: Deconstruct your flowers. You will be using only the petals. (But save that greenery for our bonus project!!*) I've found that the easiest way to take them apart is to first cut the stem as close to the bottom of the flower as you can.


This makes it extremely easy to pop the flowers apart and pull the petals free.


(My particular flowers were two-layered, but had three different sizes of petals... Go figure!)


STEP TWO: Layer three sets of petals on top of each other, shifting each layer to make the flower look more "full." Hold them in place with small dabs of hot glue in the centers.


STEP THREE: Pick a button you like for the center. I auditioned a handful of different buttons before settling on this pretty vintage shank button. You may have to use a fairly large amount of hot glue to get it to hold in place at the angle you like.


STEP FOUR: Apply hot glue to the pin back. I fold up a piece of paper to slide between the back of the pin back and the pin side. This makes it easier to hold, will keep glue off the pin shank, and will help prevent burning your fingers!


STEP FIVE: Apply the flower, hold for a few seconds, and slide the pin off the paper before the glue cools so the paper won't be permanently stuck to it.
You're done!


Pin it to a gift bag...


...or the envelope to your card!
It's a pretty little decoration for your present -- that doubles as another little gift!


(This one is my favorite!!)


Here's a little before and after of a pin I created from 2 1/2 flowers. It looks like a peony -- one of my FAVORITE flowers!

*Here's our bonus project! Turn the leftover stems and greenery into plants for plastic dinosaur play clay landscapes! My boys LOVE this project!!