
 (If you missed Part 1 about practicing your quilting, you can find it here!)
So. QUILTING. It's a big subject!
Let's start with getting things set up.
I am going to assume that most of you do not have a sewing table your machine drops down into. Quilting is most definitely easier if you DO have one of these, but it is not the end of the world! Let's work around it!
I'm going to set up my machine and sewing area the way you will likely be setting up yours so you can see that it WILL work.
First of all, if your machine came with one of these:
 This is one of the times you are going to be using it. Dust it off and attach it to your machine! It will extend your sewing area.
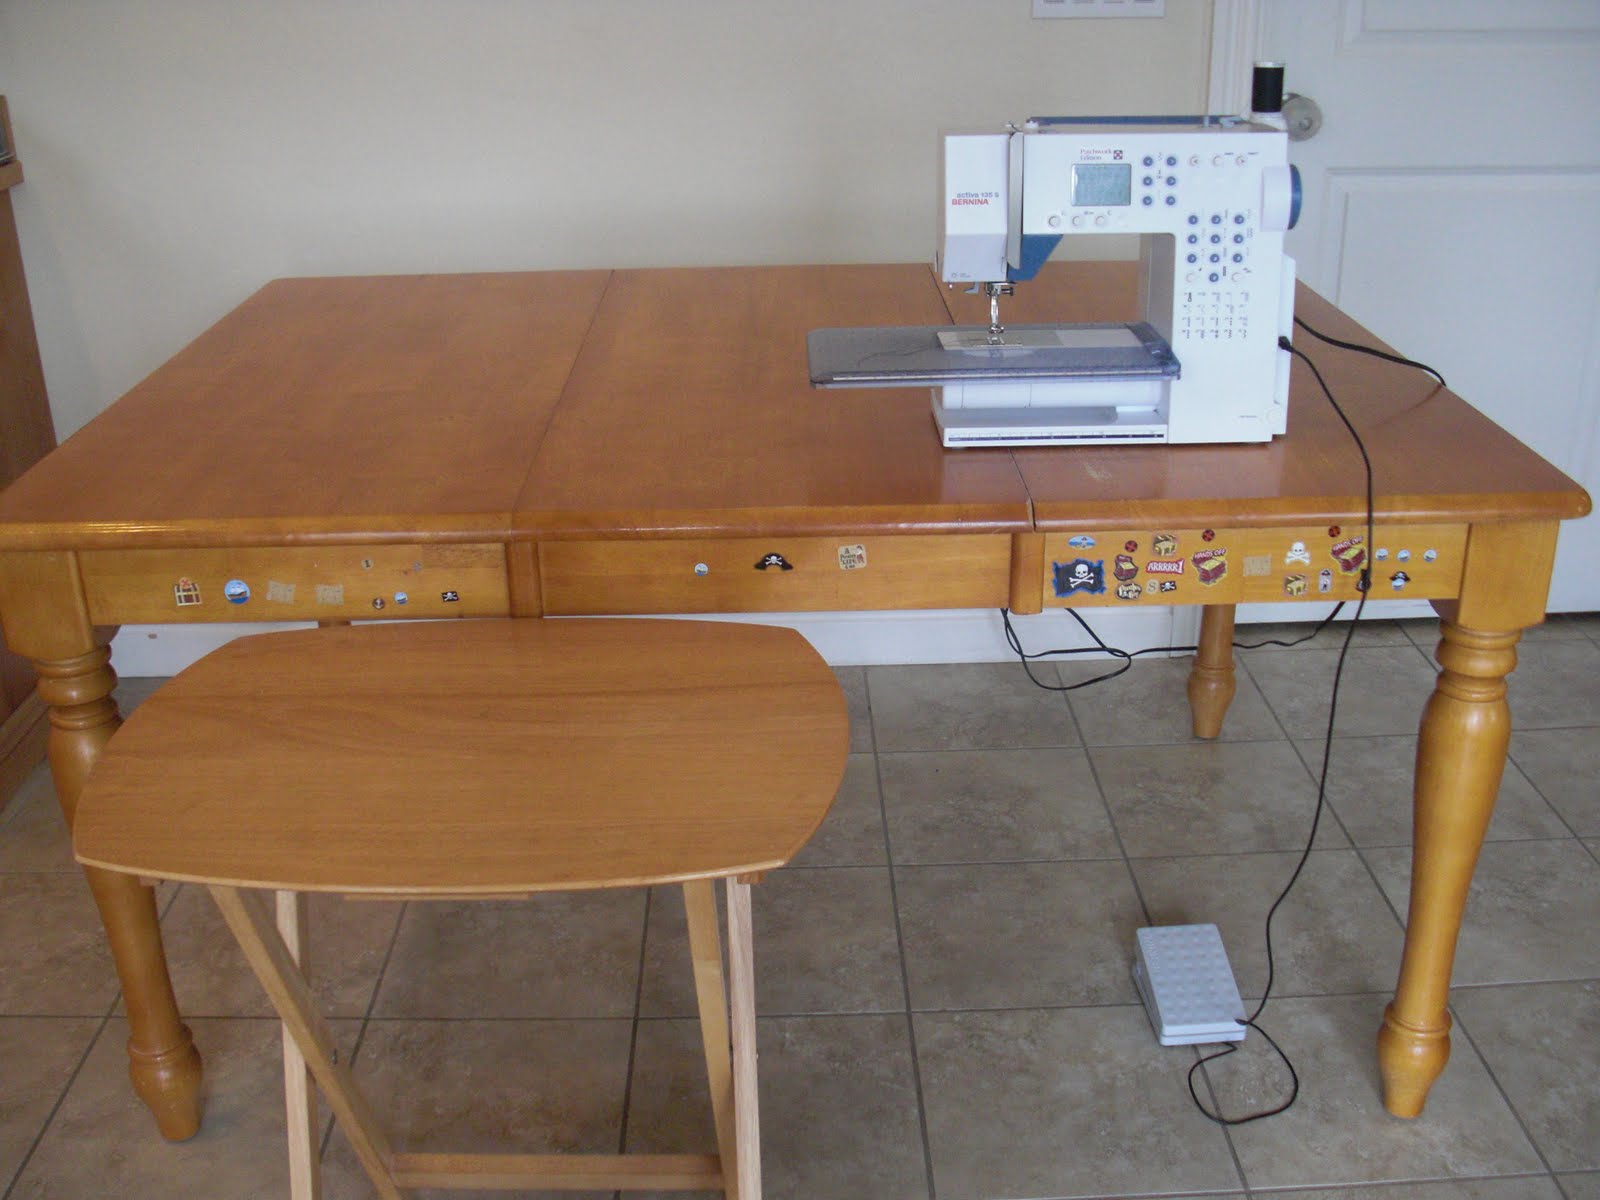
Next we're going to create even more surface area. Start with a large table. (I commandeered my kitchen table, complete with pirate stickers courtesy of my boys!) Place your machine at the front of the table, on the right hand side.
 Next you will place a smaller table in front of your larger table, to the left of where you will be sitting. I am using a TV tray, but you could use a card table or any other table that is approximately the same height as your larger table. Mine is about 6" shorter -- no big deal.
If you have an office-type chair that raises up, this would be a good chair to use for quilting. You want to do your best to have your elbows the same height as your sewing machine's sewing surface. I fell a little short of this height, but it still worked fine.
 Next comes thread selection (although I should have talked about this previously --sorry!). You want to pick a thread that matches the BACK of your quilt. I purchased both grey and yellow thread before I made a final decision on my quilt back. Obviously yellow ended up being the best choice. Why match to the back? The front of your quilt is scrappy, so you really could go with just about any thread color for the front of your quilt. But if, for example, I went with grey thread on the back of my quilt, my stitching would distract from the print. So, yellow it is!
As far as fiber content and/or brand of thread... Most serious sewists would probably recommend NOT using Coats & Clark thread SIMPLY for the fact that it is very linty and will quickly fill the moving parts inside your machine with fuzz. However, where I live it is not easy or convenient to find good color selection of other thread brands. I go with JoAnns' Coats & Clark thread, and it is fine for me. If you have concerns about thread fiber content/brand, do some research on the subject.
My thread came on 250-yard spools. You will most likely need two spools this size, or the equivalent.
 Fill at least two bobbins with thread. (You will probably end up using at least four bobbins, but this is a good start.)
 You are going to put a few miles (ha ha!) on your machine during the quilting process, so this is a good time to clean your machine.
 Make it happy before we get started!
 Replace your needle with a nice new one. I use a "universal" 80/12 needle for quilting.
 Put on your free-motion foot, lower your feed dogs, and thread your machine.
You're ready!!
Here are a few short videos with some tips on being successful in quilting:
P.S. I am not in love with how goofy I sound on video -- please don't mock me! :o)
P.S. I am not in love with how goofy I sound on video -- please don't mock me! :o)
Starting Out -- Place the bulk of your quilt behind your machine on the table and bring one corner forward and under the machine, as shown.
Getting Your Quilt Through the Machine
Quilting in the Center
 Here is an example of why you wanted a little extra room around the edges of your quilt. I've got a little "bubble" of fabric being pushed toward the edge.
 All you have to do is remove that safety pin and spread the quilt top flat.
 Whenever I run out of bobbin or have to stop quilting for any reason, I bust out a safety pin with a piece of brightly-colored yarn or ribbon tied in the loop and pin it where I stopped stitching. This makes it easy to pick up where I left off!
Okay, anyone have questions? Leave a comment!
I will leave you with this long and probably boring video of me quilting away!
HAPPY QUILTING!
21 comments:
What do you do with all those safety pins? Do you just quilt around them and remove them at the end?
Do you have any methods for making sure you get the whole quilt quilted? Do you do squiggles in rows or columns or just randomly? Can you tell I'm really nervous to start quilting?
I have the same question as Melissa--how do you move your quilt to get it all quilted--in rows, coloumns, sections--what?
Nervous--who me???
this is awesome...do you have a pattern that you follow...by this i mean starting and stoping and going over the quilt in the same way every time?
When you run out of bobbin do you back stitch where you stop and start? Love the bobby pin with yarn to hold your spot!
I have a tip for setting up your machine. I have a basic Brother machine and the feed dogs don't drop down, there is a plastic cover that goes over them. After MUCH frustration and googling, I found out that it worked better to keep my feed dogs uncovered. Just make sure the stitch length is set at zero. So if anyone else is experiencing problems, try it out.
Some people were asking about a pattern for the free motion quilting. I found this link helpful: http://www.ohfransson.com/oh_fransson/2009/03/quilt-along-14-freemotion-quilting.html
Good luck everyone! I'm excited to see the finished quilts!
You can just remove the safety pins as you go-I can never seem to avoid them. I also stop and start a lot more to adjust things than Care seems to need to! She is Good! Don't get frustrated-it is slow going when you first start doing it, but it is worth it! I'm so excited to see how everyones quilts turn out!
This is a great tutorial thanks for sharing. I just got a new machine for my birthday and im excited to try quilting. I have a question do you have to anything special if like breaks or if you run out of thread. Can we just start off where we left off? do you back stitch?
Michelle
YIKES! Here goes! Thank you for the videos - they help alot!!! :D
so helpful! i always wondered about this. thanks!
the videos are great!!! thank you!
I'm learning a lot!
Wow! I'm a very visual learner and these videos have been so helpful. Thanks for taking the time to put them together!
I just bought a darning foot at the sewing machine store today, so now I can go to town!
this is so great Care, i love your videos, it was fun watching them. you're a pro!
I just wanted to thank you. I have just finished my 1st quilt ever and I would have been lost without your wonderful hints and tips - they have been a godsend ;-)
I have put some pics in the flickr group - the quilt is just a simple 9 patch block, but I am pleased with my first attempt ;-)
Now to make another quilt for Baby No. 2!
If you ever decide to get a new table or find a table you can't live without .... you can alter it to have this:
http://home-and-garden.webshots.com/album/548224666aohcQn
I just wanted to thank you a bunch! I can't wait to start quilting and your tips and tutorials are super! Muah!
http://blooming-mommy.blogspot.com/
LOL--left my other comment too soon. Thanks so much for these tutorials! You're helping me tackle my fears of machine quilting.
I've watched these videos probably a dozen times in the last 2 days... I think I'm ready now. Here goes nothing!!
Catherine,
YAY! Go for it!! Do it!!! Can't wait to see!!!!
Yay! Quilting DONE! Binding tomorrow! :) Hooray!
Beautiful. Do you have the pattern for this quilt on your blog.
Excellent Breakdown Vector Drawing
Post a Comment