

 Here are my fabrics! I'm in love!!
Okay, let's talk cutting.
Rotary Cutters are SHARP. I cut myself with one 15 years ago. It was not pretty, and there is still slight nerve damage.
BE. CAREFUL.
 You want to set up your cutting mat in a place where you can get around three sides. You want to always cut away from yourself -- never left-to-right across your body, towards yourself, etc. I put mine on my kitchen table.
Basic cutting tips:
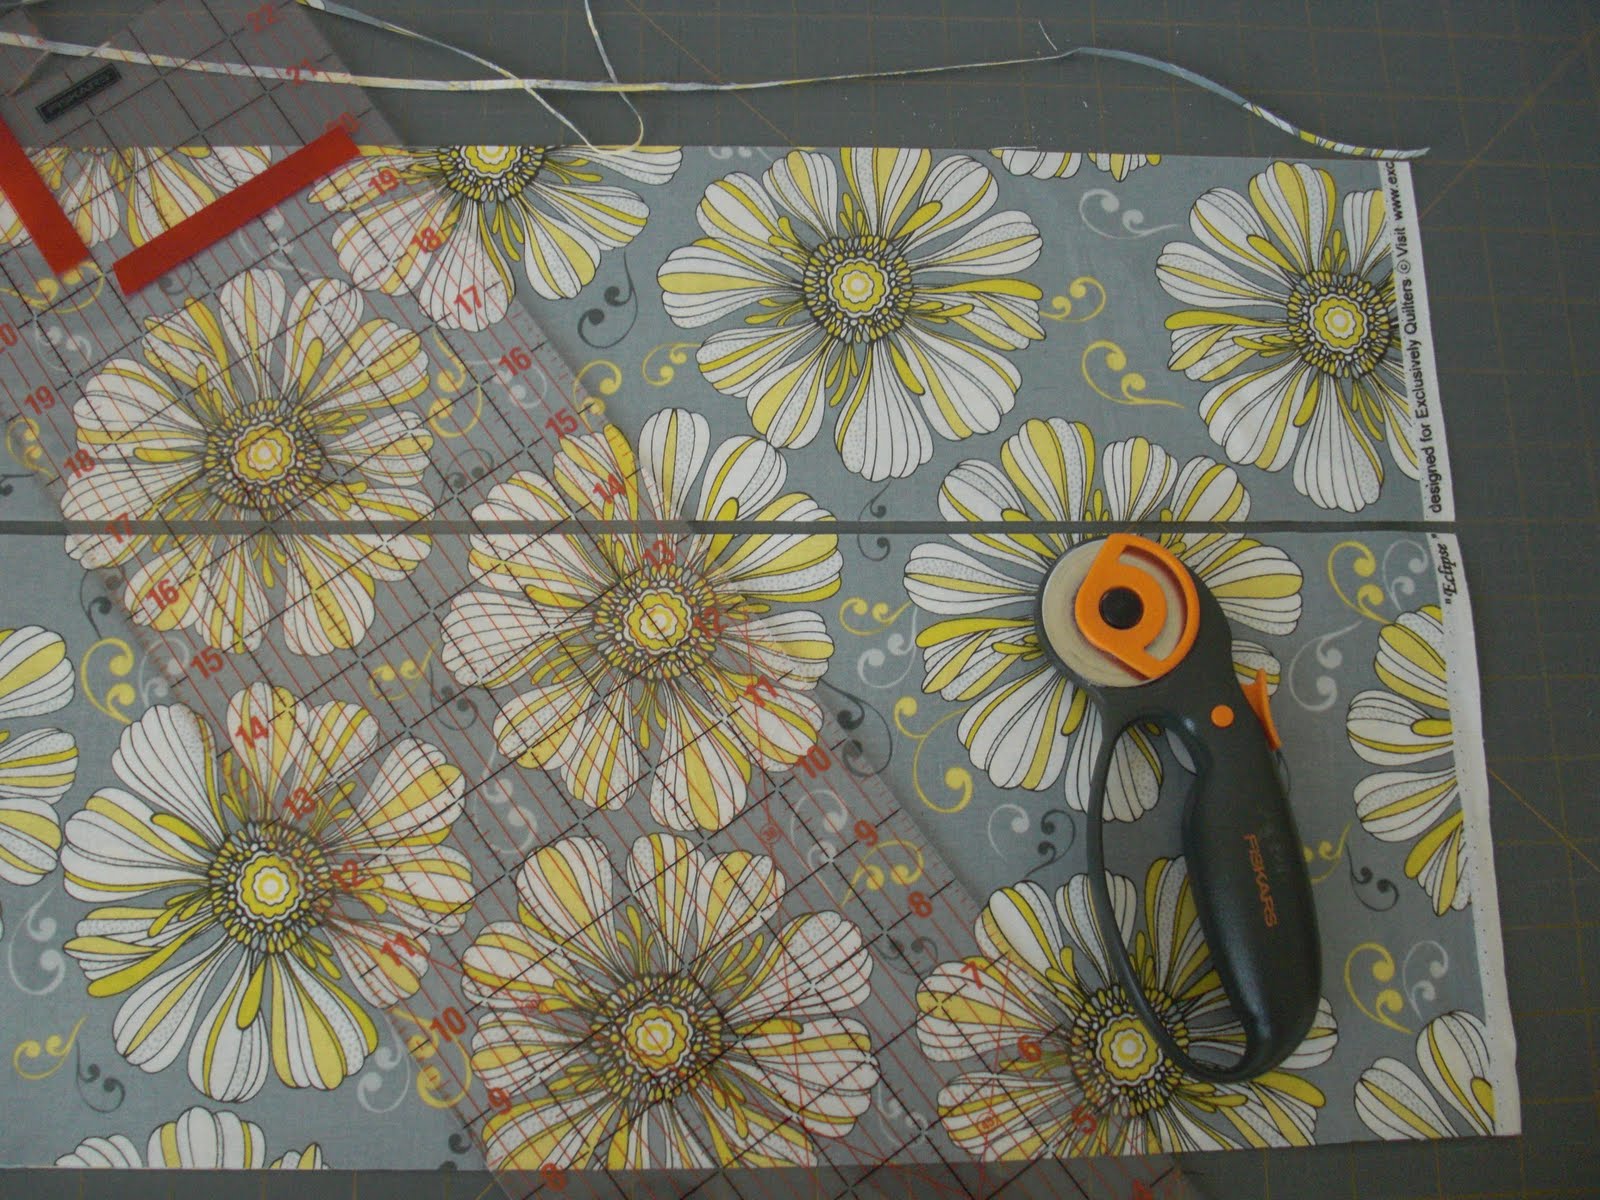
 Place your fabric against a line on your mat. Extend your ruler over the top...
 ...and bottom edge of your cut, aligning the edge of your ruler with the line on the mat. (This is why that longer ruler and longer mat are SO handy!)
 I lay my forearm down on my ruler (since it IS so long) to keep it from slipping. Check your ruler again to be sure it is still lined up, and make SURE your fingers are out of the way! Cut, starting at the bottom (closest to you) and ending at the top (farthest from you). Easy!
Okay, on to cutting OUR fabrics!
My instructions are with the school of thought,
"Easier is Better -- Nothing Bad has Ever Happened in All The Times I've Done It This Way!"
(If I were a cross-stitcher, I would cross-stitch that little quote and hang it on the wall in my sewing room!)
There is a lot out there on the web about grainline and how to find it, how to straighten it, and how to cut the RIGHT way when considering your grainline. Don't get me wrong -- the grainline IS important.
But maybe not AS important in a quilt as in an article of clothing!
Here's how we will cut our fabrics:
 I start with my fabric folded as it was on the bolt. (I hear the gasps!)
(If your fabric is wrinkled, press it. Wrinkles make for very bad cuts! Keep it folded when you press, but do not press the foldline.) I DO check to see if my fabric is folded on-grain. It's usually right on, or at least "close enough!" I line up my fabric as shown in the photo, with the fold lined up exactly on one of the lines of the mat at the left.
A quick thought on the fine ladies who cut fabric at the store. Most are good. Some are notoriously bad. (There are a few I recognize and try to avoid when it's my turn to have my fabric cut!) If you are starting with a bad cut (i.e. you didn't get the full amount of fabric you paid for), it can be EXTREMELY frustrating. I even had a few bad cuts in my current batch of fabric -- which is from one of my favorite quilting shops! I even ended up taking one of the cuts back -- it was simply unusable!
Here is what to check: You want the top edge of your fabric to slightly overlap a line. Check to see that both layers of your fabric are overlapping just a tiny bit -- you are going to re-cut that line perpendicular to your fold. On your 1/3 yard cut (which is what I have shown in the photo), be sure you have a full 12" of fabric. If not, take it back and complain! :o) You will also re-trim the bottom edge. Make sure both layers of fabric are overlapping that bottom line, too!
 For your two 1/3-yard cuts of fabric:
Trim the top edge first. Then go down 6" and cut, creating a 6" strip. Then down 6" more to cut a second 6" strip.
Aaaaaannnnnnd..... I've screwed it up already -- on the FIRST cut of my quilt!! Measure TWICE, cut ONCE, ladies!! I cut a 5" strip instead of a 6" strip! BLAST!! Back to the store to buy more!!
 (Pretend you see two rows of the same thing here! I have scooted the squares around so you can see where I cut.)
Move away your top and bottom trimmed bits. Don't disturb your two 6" strips!
Starting 3" over from the fold, make your first vertical cut. Then cut in 6" increments for the remainder of your two strips. You will end up with a total of fourteen 6" squares. Repeat for your other 1/3-yard cut of fabric.
 Here's your 3" cut unfolded -- a 6" square!
 Now for your 1/4-yard cuts.
Line up your fabric with the fold at the left, lined up on one of your mat lines. (Make sure you have a full 9" of fabric to work with!) Trim the top edge. Go 6" down and cut. Go 3" down and cut. You will have a 6" strip and a 3" strip.
NOW, move your 3" strip out of the way! If you want to go ahead and trim off your selvages, just scoot it down a little bit and trim them off. Use your ruler and be sure to cut them off squarely! Set your strips aside -- they will be used later for your binding and for the pieced strip on the back of your quilt.
You will then cut your 6" strip into seven 6" squares, the same way you cut your squares from your 1/3"-yard cuts of fabric.
 This is my little pile of waste -- no scraps! :o)
When all your cutting is done you should have eight 3" strips and 84 6" squares! YAY!!!
(Is anyone making the simpler version using Fat Quarters? Need help with that cutting? Let me know if you do!)
UPDATE: Here's a link with instructions for cutting the fat quarter version!
31 comments:
BY THE WAY... Since I am sure someone may be wondering...
Prewash or not?
NOT! I consider it a waste of time. UN-prewashed fabrics are MUCH easier to work with! And, if you prewash, you will have to press -- and press -- and press your fabrics! Don't bother with the prewashing, folks! :o)
I've got oodles of fat quarters already, so I'd like to use them... (I'm an experienced quilter, but love quilt-alongs, and this would be a good use for my FQs)
if you have a layout for the FQs, that'd be helpful...
I'm with you there! I never bother prewashing and I love how my quilts turn out!
I hate the math part of quilting-thanks for taking the time to work this all out!
The fabrics you've chosen are gorgeous! I can't wait to see how the quilt looks when you are done!
Ooh, I better hurry and get my house clean! My husband said that if I did, I could go buy my fabric and start cutting! :) Off to scrub the kitchen sink!
Now I'm glad I have the laptop! I'm going to have it right next to me when I do this! Wait 'til you hear about me choosing fabrics...oy vey.
I'm using fat quarters because I remembered I had bought some last year at JoAnn's when they were on sale. So....any help with the layout and cutting in that department would be appreciated. Thanks
Oh crap. I already pre-washed. Darn it.
Where did you get your fabric? I have been looking for fabrics in Grey and Yellow and I LOVE yours!!!
By any chance do you live near my favorite quilting shop of all time: Sew-Bee-It, in Ringgold, GA? Cuz I was just there last weekend, saw those EXACT fabrics and loved them myself! And to Jonie: if you do not live near there, you can shop on their website and I think you can order those prints. just google the shop name
OMG! I must have those fabrics! Where did you get them, who makes them? :)
You have such a great eye for fabrics and patterns! I love your choices!!
Jana
Mine are all cut and ready to go! (I had to do it when I was motivated!!!) Here's the link if you want to see!
http://craftdiscovery.blogspot.com/2010/04/sneak-peak.html
I have never made a quilt before and I want to make a quilt for my baby on the way...I have my fabric and no idea to go about it. Thanks for showing how to cut. It makes me feel better about starting. =)
I am just new to sewing, and I want to attempt my first quilt this summer. Thank you for such a great tip regarding cutting the fabric :)
Care, you are the best!!! I hope you still remember me (a box of stretchable fabrics...hint, hint, hint...)
Cathy
beautiful material. I'm excited to see how this quilt thing works!
Thanks!... and a question. My mom always said to get the fabric wet, then dry it and iron it (so it doesn't shrink funny). I don't think I'll be doing this next time; but if I've already wet/ironed PART of my fabric, shouldn't I do that to the rest or will it not matter? To add to that, I bought (I know, I know.. ) Joann's "keepsake calico" fabric because I got a giftcard. Have you noticed a big difference in quality of fabric? Will I regret buying that instead of a more expensive one from a quilting shop? Thanks again!
Hi Heather!
There are two schools of thought on prewashing fabrics! Many quilters prefer to prewash and dry their fabrics. Many don't -- myself included! I prefer the feel and manageability of fabrics that have not been prewashed. I also like the feel of quilts that have been washed AFTER they are made -- they seem to shrink up a bit and meld with the batting, making them, in my opintion, a little bit more snuggly. It's all a matter of preference!
As far as having some prewashed and some not... I really don't think it would make a huge difference, but who knows! That one's up to you! :o)
I use fabrics from JoAnns ALL THE TIME. It is a rare quilt for me that is made from all quilt shop cottons (my own quilt for 1st Quilt Ever is a rare instance!) Let's face it -- with the amount of fabrics I buy and quilts I make, it just isn't feasible for me to be a "quilt shop snob!" :o)
In many (probably most) cases there IS a difference in quality in Joanns fabrics versus quilt shop cottons. But you can tell by feeling the fabrics whether the quality of the fabric is just plain unacceptable.
Great questions! Good luck with your quilt!
Care.
Thanks so much for your response! That helps a lot. Now I guess I have to decide if I want to go through the work of washing the second half, hmmm.... Good to hear your not a quilt shop snob too :)
I am using fat quarters (I bought them before I read this wonderful entry, whoops!) and this is my very first quilt. I would love cutting instructions for fat quarters if you don't mind, thanks!
You can find the fat quarter cutting instructions at http://obsessivelystitching.blogspot.com/2010/04/1st-quilt-ever-cutting-fat-quarter.html
Good luck! :o)
I have had the first ever quilt bookmarked forever...well, at least it seems this way. Now that I've graduated from college and since I'm on vacation from work, I've started working on this quilt for my niece's 1st birthday. I made the first cuts today. It's so exciting!! Thanks for this :)
I am using fat quarters and this is my very first quilt EVER. I would love cutting instructions for fat quarters if you don't mind, thanks! I'm sure I'm the millionth person to ask.
I bought my fabric yesterday, and I'm just as terrified as I am excited! (I just started sewing, self taught I might add, about 7 months ago.) I have been craving making a quilt and I am SOOO happy that you did these amazing tutorials! Here's hoping I get all of my cuts right! I live an hour from the fabric store! Yikes! Thank you for making this look so easy and do-able!
Thank you so much for taking the time to make this tutorial. I sewed a bit in high school, and I did a rough crib rail teething guard for my son last year.
I asked for and received a sewing machine for my birthday in April, (I've yet to use it yet!) and have had the itch to create something amazing. I decided I wanted to try to make a quilt for my son and found your website through a friend. I just really appreciate your detailed instructions. Thanks for making it a little easier for me!!
Care!
I've finally (sorta) settled into Alabama after losing our VA house. I'd like to get this quilt done before moving again to our own place- hopefully soon. I've read the tutorial no less than a dozen times. I'm just so SCARED to cut my fabrics.
Crud! I'm making two quilts at the same time. Cutting of the 1st went just fine, cutting of the 2nd I made a boo boo and forgot to go over 3 inches for the first cut. I'm a block short :(
Eek! I pre-washed my fabrics, and they apparently shrank enough that I can't get the correct cuts.
Trillian,
Don't Panic.
HA HA HA! I crack myself up!!
No, really, just reduce all your cuts by whatever you need to in order to fit everything. You could cut everything down by, say, 1/4" and be fine. If you have more questions, feel free to email me!
Care.
Thanks so much for posting this tutorial! I'm having issues with my rotary cutter. Actually I have two that I took out of the packages just when I started this quilt. I cut both of the 1/3 yards and now neither one is working. It has to be me?! I'm using a self healing mat. . .and cutting the way you've demonstrated. How long do blades usually last and where's then cheapest place to get them? Thanks!
Post a Comment